Windtrace: Seekers and Strategy is a capture-the-flag-style limited-time event in Genshin Impact that has players take the roles of Hunters and Rebels in a race against the clock and each other. Windtrace takes place in Mondstadt, with several stages in Liyue and Inazuma.
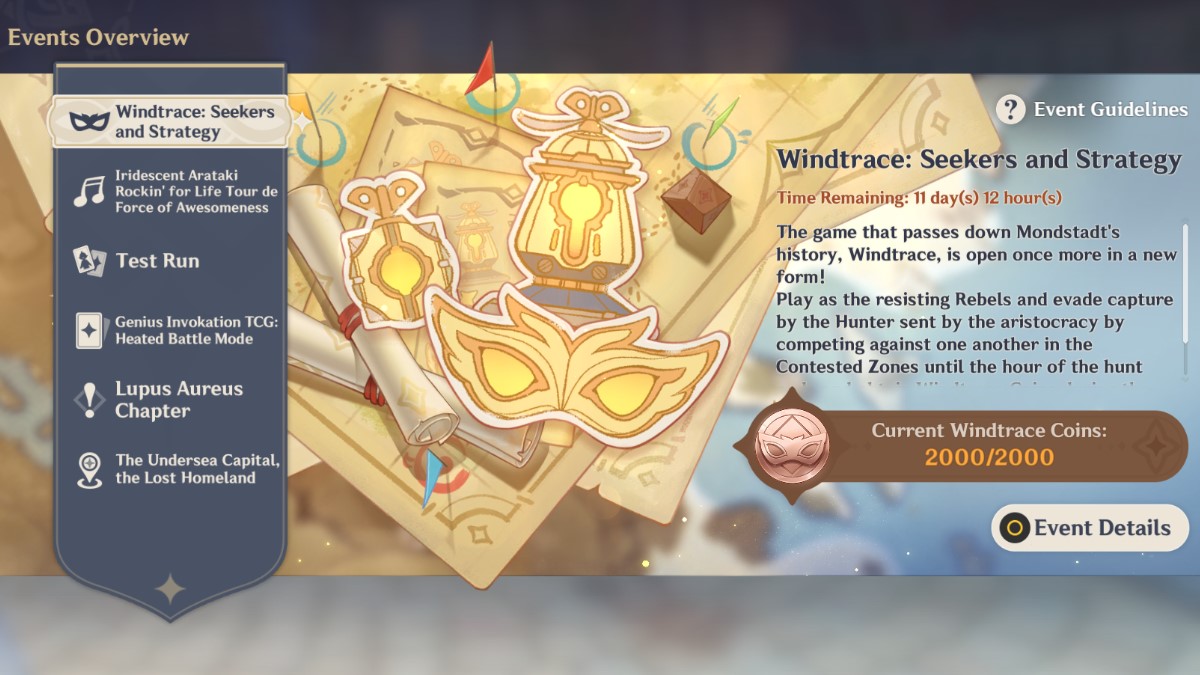
About Windtrace: Seekers and Strategy
Windtrace is kind of like a game of Capture the Flag mixed with Mafia or Among Us. Four players are chosen to enter a stage in co-op mode. Three of these players are the Rebels. Their job is to repair four Signaling Devices scattered throughout the map while avoiding getting caught by the Hunter.
The Signaling Devices take time to repair, while at the same time, the Rebel who is repairing it is vulnerable to the Hunter’s attacks. You won’t have access to your characters’ abilities during this challenge. Instead, Rebels have the ability to temporarily disappear and to disguise themselves as ordinary objects. Meanwhile, Hunters can track Rebels’ movements and catch them with an AoE attack.
The last player becomes the Hunter, the one who tracks the Rebels and captures them. Each Rebel has two lives, and the Hunter needs to either capture every Rebel twice or capture every Rebel within quick succession. When Rebels are caught, they are sent to a containment zone where they stay while they respawn. Respawning takes around 20 seconds. However, if another Rebel sees their fellow Rebel respawning, they can rescue them by clearing their cooldown early.
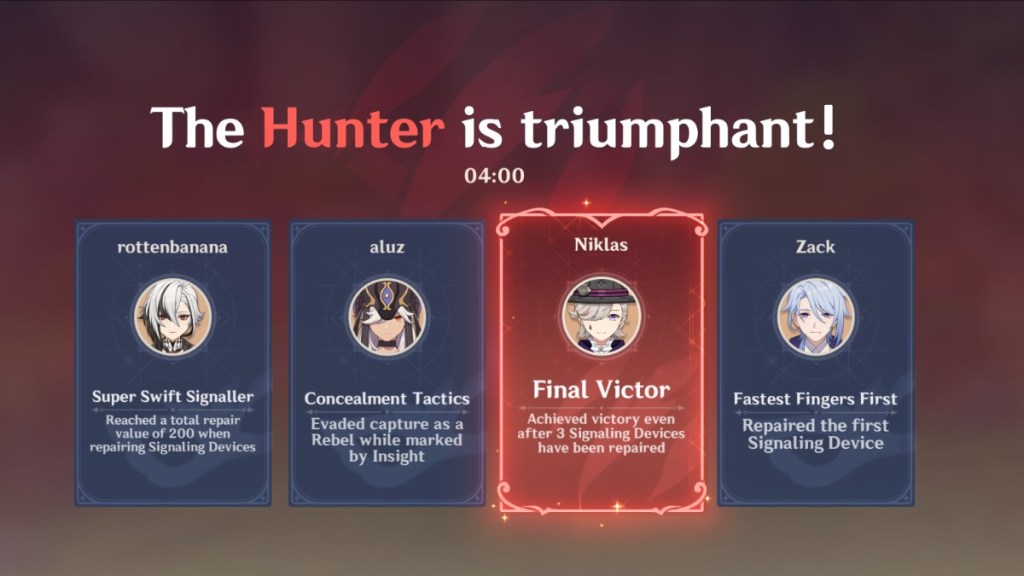
Players have a few minutes to complete their respective goals. The game ends when the time is up, four Signaling Devices are repaired, or the Hunter has captured everyone at once or twice, or time is up, and Rebels haven’t fixed all the Signaling Devices.
Windtrace Hunter Strategies
Familiarise yourself with where the Signaling Devices are (they will appear on your mini-map) and design a patrol route for you to default to, which will ensure that you can easily keep an eye on all of them. You’ll need to sprint there if you spot a Rebel trying to repair them.
That said, don’t always go the same way, or Rebels will pick up on that and avoid you. If you spot a Rebel near a Signaling Device, but they disappear as you approach, do your capturing attack at the surrounding area or at any nearby objects. Chances are that they’ve hidden themselves or disguised themselves nearby.
While you can’t make use of your abilities, you can still make use of characters’ passive abilities. Because of this, make use of characters who get speed boosts during certain times of the day or who have decreased stamina consumption, like Kazuha, Rosaria, Dehya, and Razor. You should also make use of taller characters like Kaeya, Candace, Kaveh, and Itto because they will help you run faster.
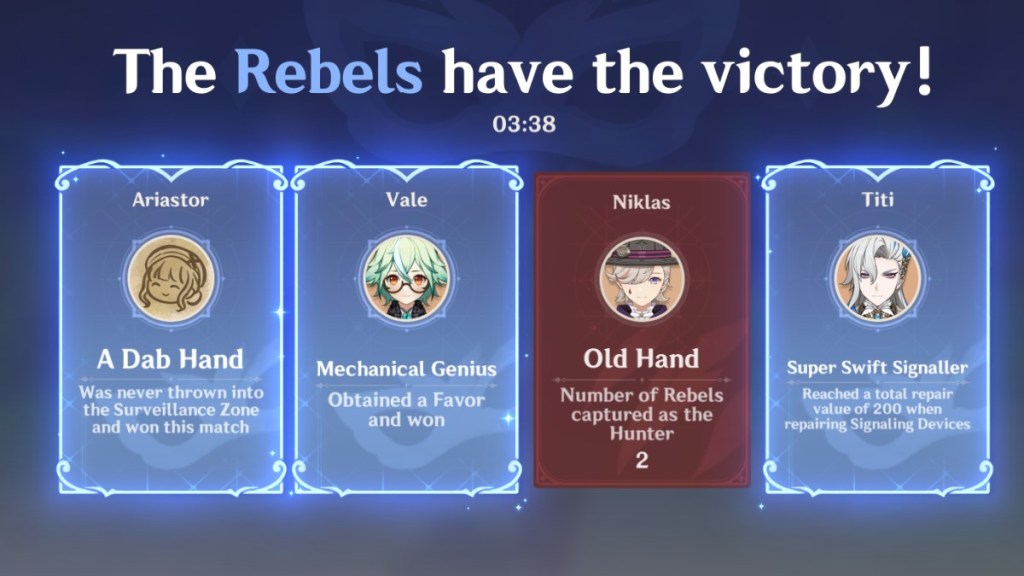
Lastly, and most importantly, familiarise yourself with the Rebel strategies below and remember how you play when you’re playing a Rebel. The best Hunter is the one who knows what their Prey thinks.
Windtrace Rebel Strategies
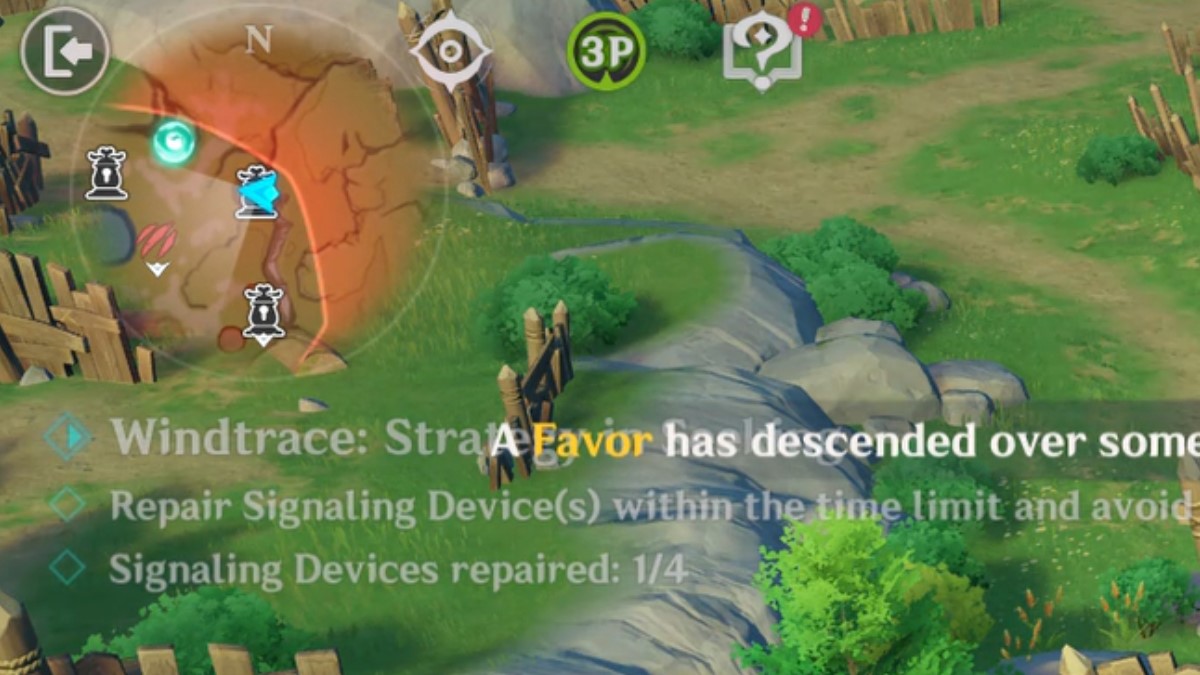
Keep an eye on the mini-map because Hunter’s location will be marked by a red claw mark icon. If they’re approaching your location or seem to be following you, run and find a safe place to hide. The best way to disguise yourself is near similar objects (like crates) or in places where there’s lots of natural greenery.
You’ll go undetected more easily in these locations. Hunters who encounter a chair just sitting there in the middle of a path are likely to clue in that you’re there. When activating your disguise, don’t do it near the Signaling Devices. Hunters know how Rebels’ minds work, and they’ll activate their signaling attack in the area around Signaling Devices. If a Hunter is approaching, run a short distance away before transforming, ideally under the cover of other objects or shrubbery.
If you approach a Signaling Device, but there’s another character already trying to fix it, don’t go elsewhere. The more characters who are repairing a Signaling Device at once, the faster it can be repaired. There is a glitch that occurs occasionally when respawning. If you sprint right before the barrier covers your character, you won’t be stuck in one spot.
We discovered that you’re still invulnerable to the Hunter’s attacks until you fully respawn, but you can’t repair any Signaling Devices until then. Lastly, the advice about character height and running-based passives that were mentioned earlier stands for Rebels as well. While you can’t use your character’s abilities, if your character has a tall body type or has a passive ability, you can take advantage of that.
Obtaining Favour In Windtrace
In the last part of a match, a power called Favour will appear somewhere on the map. Both Rebels and Hunters can collect this power, but there is only one available. For Rebels, Favour helps you evade detection from Revels for an extended period of time. For Hunters, it locates all the Rebels on the map for a short period of time.
About The Canyon Confrontation
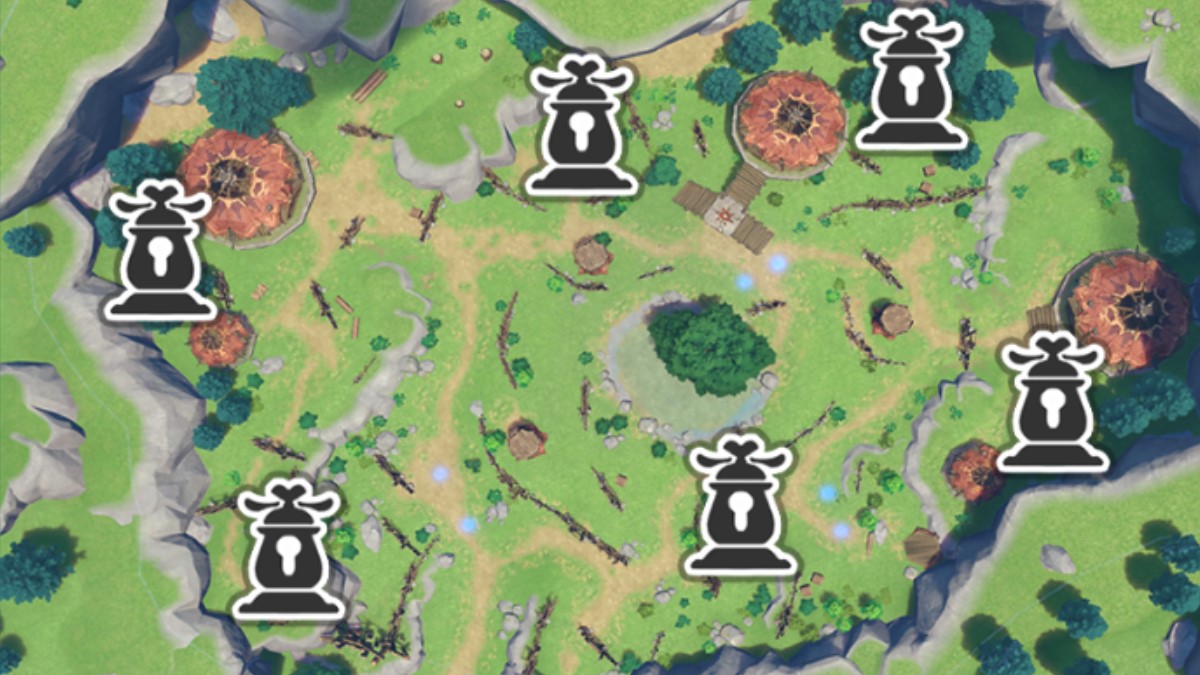
Canyon Confrontation takes place in a Hilichurl camp in Mondstadt. The Signaling Devices are located at the top of towers and behind barricades. The terrain is filled with shrubbery and crates for Rebels to hide in. Rebels are able to disguise themselves as barrels, crates, and stumps.
Canyon Confrontation Strategies
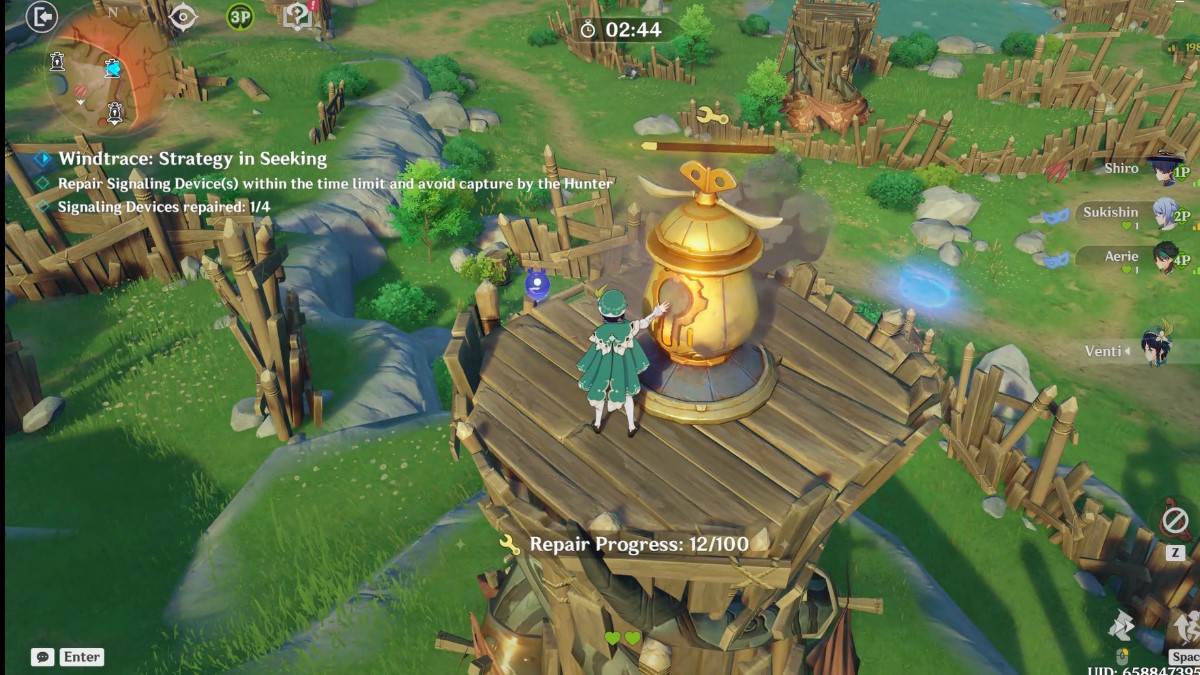
Many of the Signaling Devices are located up high at the top of towers. This is advantageous for Rebels because it’s not easy for Hunters to see them from the ground; they can keep an eye on where Hunters are without using the mini-map, and if they see a Hunter approaching, they can just glide away.
For Hunters, there’s a lot of shrubbery, barrels, and crates around the map. Rebels will undoubtedly try to hide in those locations, so make sure to fire your capture attack at these areas. Aside from that, good luck Hunters. This is one of the hardest maps to hunt in.
About The Winery Confrontation
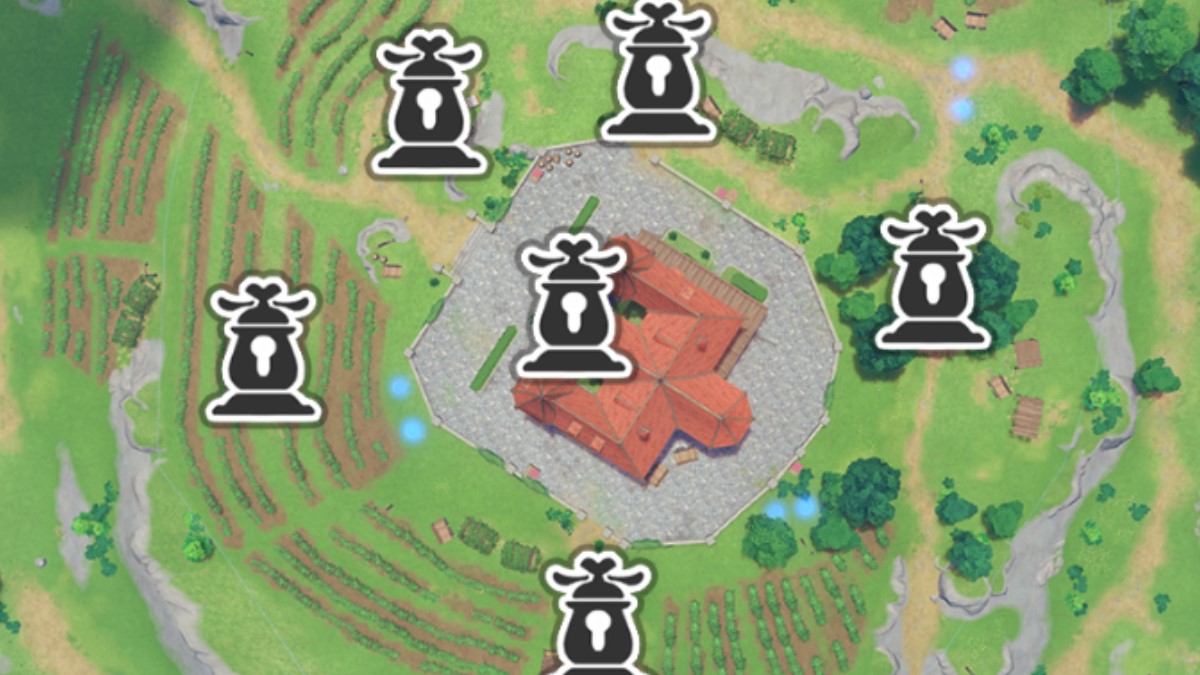
The Winery Confrontation takes place in the Dawn Winery in Mondstadt. The Signaling Devices are located around the mansion, between the vines, and in hidden alcoves. Rebels are able to disguise themselves as barrels, chairs, and lanterns. The size of the disguises and the natural greenery make this map the easiest to hide in.
Winery Confrontation Strategies
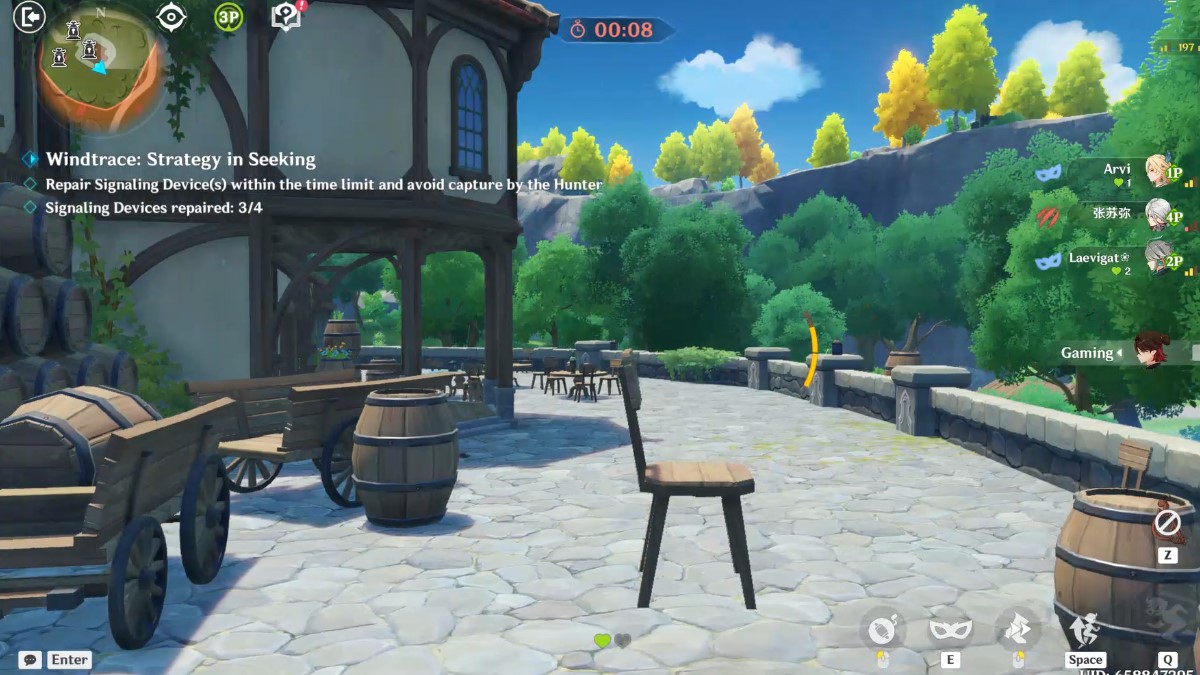
There is a lot of shrubbery on this map, making it the easiest map to hide yourself into. This map also comes with the best disguise: the lantern. The lantern is small, hard to spot, and makes it easy to hide almost anywhere. Hunters have a pretty big vantage point when climbing to the top of the mansion, but that can be a big time sink, so only use it if you have no idea.
The easiest signaling devices for you to monitor are those located close to the mansion, so you’ll have a pretty good time monitoring them. Rebels will know this, too, so make sure you’re patrolling the outer edges of the map because that’s where they’ll be.
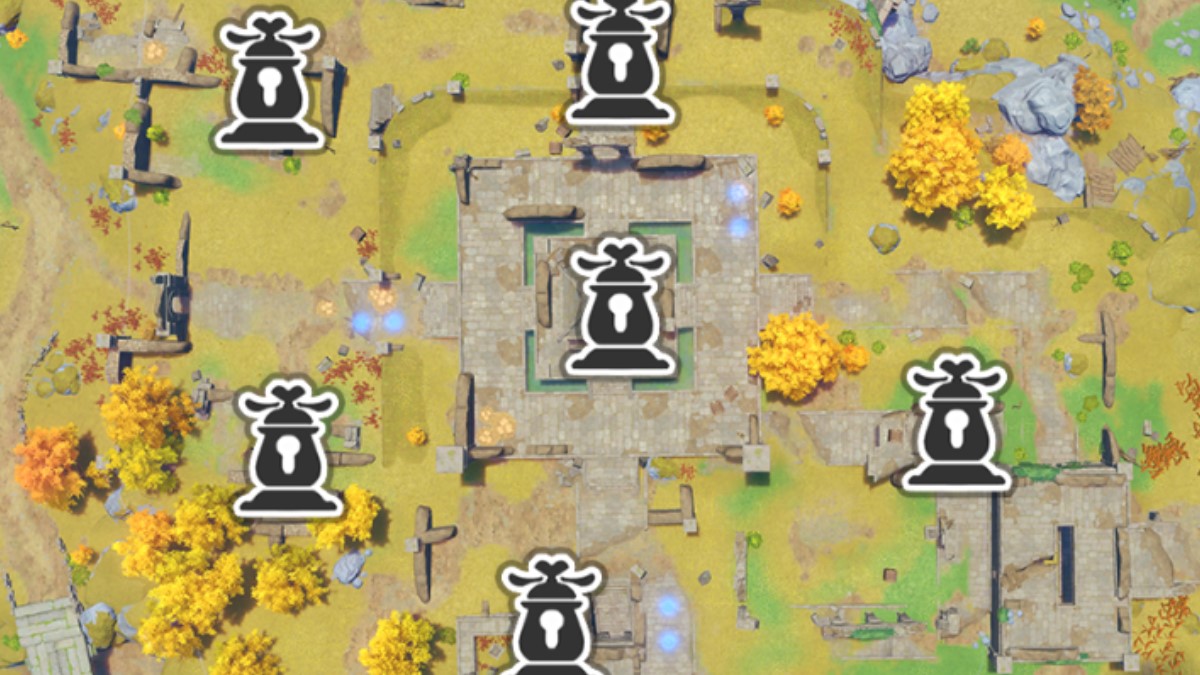
About The Rumble In The Ruins
The Rumble In the Ruins takes place in the ruins of Liyue. The Signaling Devices are located within different structures in the Ruins in a grid-like pattern. Rebels are able to disguise themselves as crates and torches.
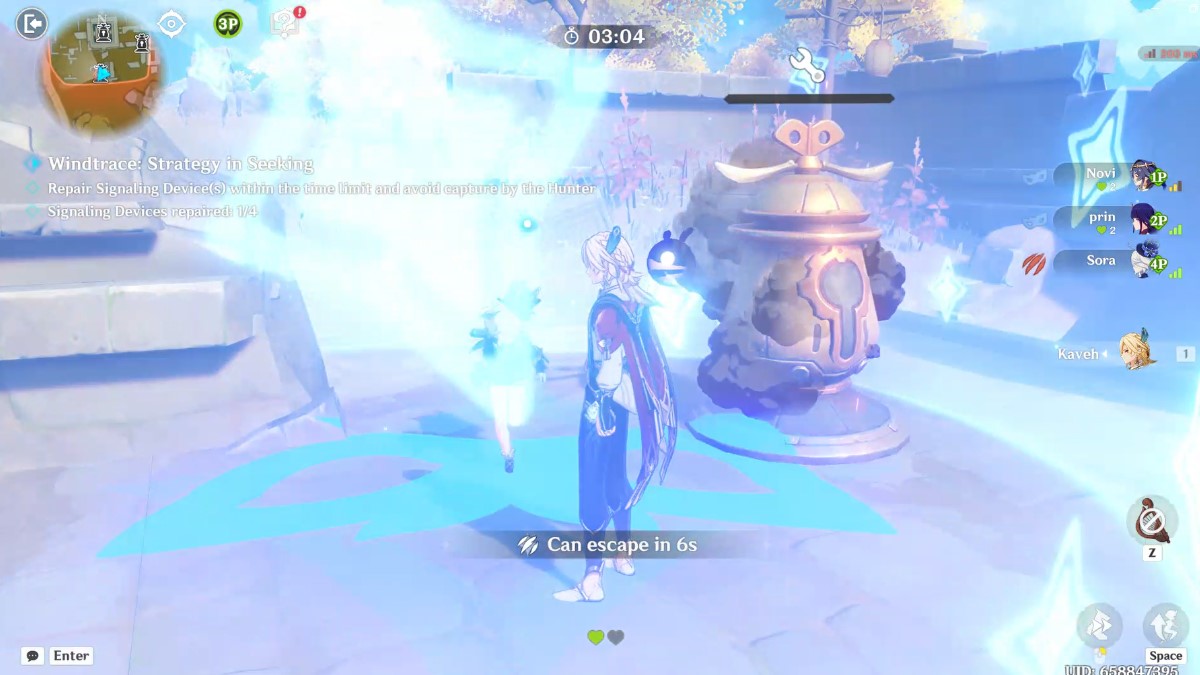
Rumble In The Ruins Strategies
This map is the most challenging one for Rebels because it is so flat and has lots of obstacles. Disguises aren’t as useful because there isn’t much for you to hide behind, and it’s all too easy for you to stick out like a sore thumb. If you’re in a pinch, some of the Signaling Devices have hidden basements under them that most people don’t know about.
The Hunters (probably) won’t find you there. There’s not a lot to say about this stage for Hunters because this is the easiest stage for them. The combination of the flat terrain and the grid-like placements of the Signaling Devices makes it easy for you to spot and track Rebels. Get ready to run and prep your reflexes to catch some Rebels.
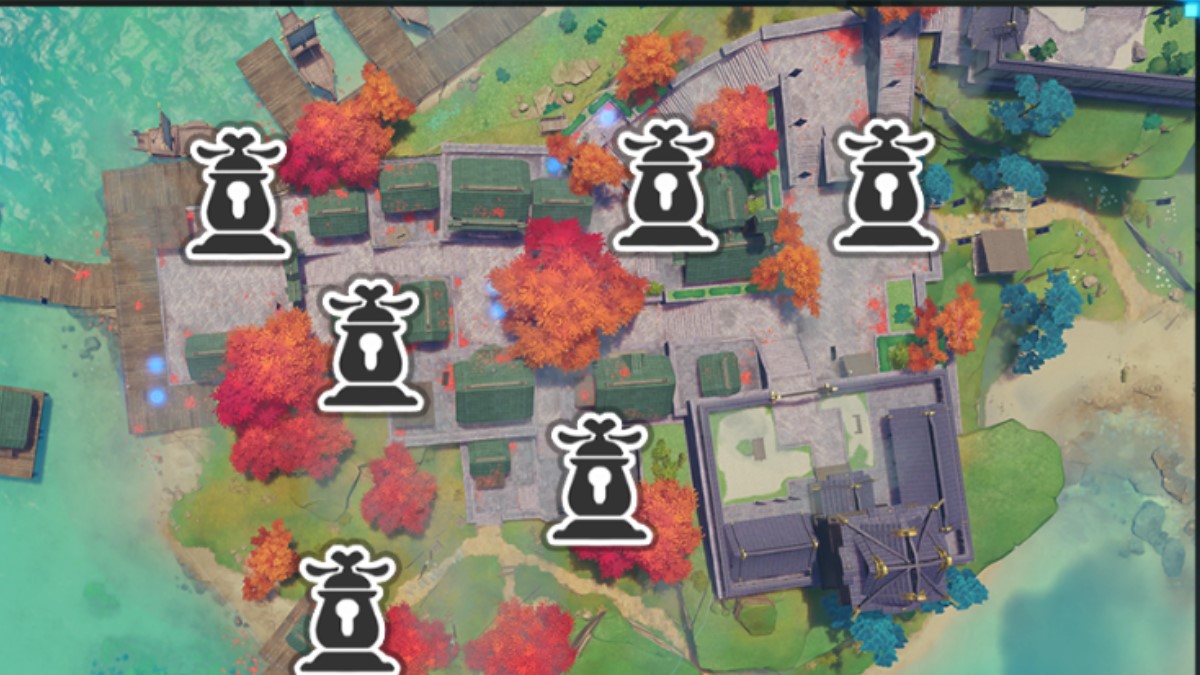
About The Ritou Runaround
Ritou Runaround takes place in the town of Ritou in Inazuma. The Signaling Devices are dispersed throughout, hiding in alleyways and behind the village’s structures. Rebels are able to transform into barrels, two kinds of storage containers, and stools.

Ritou Runaround Strategies
Ritou is a pretty even playing field for both Rebels and Hunters, so it ultimately comes down to your strategy and luck. If you’re a Rebel, make use of Ritou’s various nooks and crannies. If a Hunter is heading towards you, there are usually a couple of options for you to escape and lose them in the city. There are lots of crates and such around the Signaling devices, so if a Hunter is coming, there is ample opportunity for you to disguise yourself.
For Hunters, the easiest way to check Signaling Devices is by running up and down Ritou’s main road, but if you rely on this too much, the Rebels will catch onto that and easily avoid you. There are lots of objects around the Signaling Devices for Rebels to blend in with, so make sure to use your capturing attack on the objects just in case.
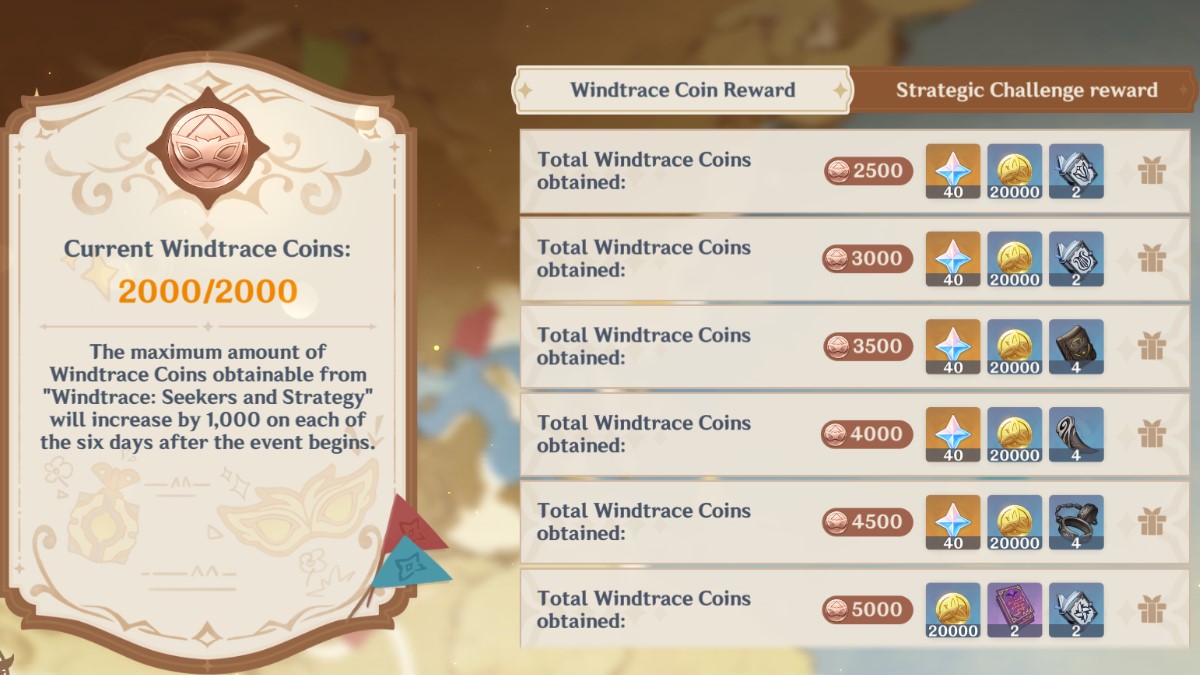
Rewards For Windtrace Genshin Impact
You can gain Windtrace Coins by playing the Windtrace game and for making certain accomplishments (they are pretty easy to achieve by just playing the game). These Windtrace Coins can be exchanged for rewards, which scales off the total amount of Windtrace Coins earned.
However, for the first week of the event, there is a cap on how many Coins you can earn per day, starting at 2,000 and increasing by 1,000 every day for six days. After six days have passed, you can earn as many coins as you wish. There are also rewards you can earn from making the following achievements:
- Accumulate 150 repair value from repairing Signaling Devices (which amounts to one and a half Signaling Devices).
- Be the first one to completely repair a Signaling Device in a match.
- Capture a Rebel while you are the Hunter.
- Obtain Favour in a match.
Whether from Windtrace Coins or achievements, all rewards consist of a combination of:
- Primogems.
- Mora.
- Talent Books.
- EXP Books.
- Weapon Enhancement Ore.
- Weapon Ascension Material.
Genshin Impact is now available on Android, iOS, PC, PlayStation 4, PlayStation 5, and PC.