
This is a rough guide for everyone that tried (or wants to try) the Japanese Final Fantasy Type-0 demo and found that the language barrier was getting in the way. It provides menu translations/features and a brief overview of each character. Please don’t reproduce it anywhere else without our permission!
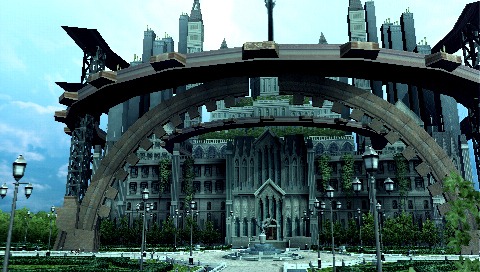 The demo for Final Fantasy Type-0 starts off with rather heartrending cutscene that is better off seen rather than described. Somehow, within a minute, they managed to get me to like a character before taking him off the screen for good. When the controls are finally turned over to you, you’ll find yourself in control of Rem at the Suzaku magic academy . There isn’t much to explore, but the area is pretty and convincing, with students walking, talking or chilling nearby on a park bench. There’s a fire bird atop a fountain, wings spread wide. There are roads leading to the left and right, but they’re not open yet. Across, there’s an enormous building that, no matter how you rotate the camera, you can’t see its top half.
 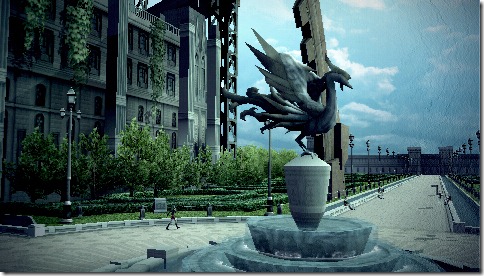 Since that’s the only place to go, let’s go through the door by talking to the moogle with a blue icon over his (its?) head. Select the first option, and enter. Something to keep in mind: Blue icons indicate anything ranging from area changes to item shops, or people you have to talk to. Red icons indicate quests and missions. Inside the salon, there are several things to do. First, let’s go into the practice battle. Talking to the moogle in the center of the room with a red icon over its head nets you a small menu. The options are as follows: Practice Battle Mission One Nothing Choosing the topmost option takes you to a simple multi-part battle that breaks down the various aspects of the Type-0 battle system. Type-0 controls are fairly complicated, reminiscent of Gods Eater Burst. The D-pad controls the camera, and the analog stick is used to move around. There are four moves, one assigned to each button. In general, the Triangle button is a melee attack, the X button is a defensive move (either guarding or a Cure spell), and the Circle and Square button are either abilities or magic spells. Guarding eats at the Ability Gauge (located on the right, above the spells), while Cure spells take MP to cast. Abilities use the Ability Gauge (which you can see under the character portrait to the left) and it’s refilled when you attack an enemy with a melee move, whereas magic spells use MP. The longer you hold the spell button (i.e., the longer you choose to incant the spell), the stronger the spell will be. HP can be recovered by standing still or by “sheathing” your weapon with L+R. Doing the latter causes the HP to rise dramatically, but you have to wait a moment to draw your weapons again. However, MP doesn’t recover automatically. In the demo, there are only four ways to do so. The first is using an item, the second is using the Healing Circle, and the third is to collect Phantoma. The last is only available to one character, Ace, and will be mentioned later.
  Phantoma are collected from defeated monsters. Just approach a monster and, if you’re close enough, when you press the R button, the monster’s body will start floating and a cursor will appear. Once the cursor rotates and “snaps” into place, you can press any of the command buttons except X, and the monster’s body will explode into red wisps and you’ll get your Phantoma. Each Phantoma is categorized by color, which corresponds to the type of spell they can upgrade. For example, Red Phantoma upgrades Fire spells, and Blue Phantoma upgrades Blizzard spells. You can’t upgrade spells in the demo, though, so just collect them for fun. In addition to these moves, it’s also possible to dodge attacks by using the analog stick and X, and to target an enemy using R. The R-button is a bit tricky to handle. A simple tap swings the camera behind the character. Holding it locks on to an enemy. However, if you move too much, the lock is undone. Also, if, when you lock-on, you see the cursor turn red, you can attack for a critical hit, accompanied by a very satisfying flash of the screen signaling the death of the monster. You can also press the Start button to open the main menu. From there, you’ll get a series of menus. You can switch between menus with the L and R buttons. The different submenus (lined up on top) are as follows: Information Item Members System Control Explanation The Information screen differs in and out of battle. The different options under that submenu are: (out of battle) Pause Game Quest (only out of battle) Practice (only out of battle, not available during demo) Return to Title Screen (in battle) Pause Game Quit Mission Return to Title A press of the R button brings you to the Item screen. This has its own set of sub-categories: Items Weapons Accessories Phantoma Chocobo Most of those don’t lead anywhere, seeing as you can’t get a chocobo or new weapons. If you select the Item category, you get this handy menu: Use Organize If you want to use an item, you have to go through this menu without pausing the battle and without the option to dodge. Equipping an item allows you to assign it to the Select button, which you can use immediately during battle without going through this whole process. You can only assign single items though. Another R button press brings you to party members, but there’s no real reason to come to this screen. You can reorganize the order your party members or reserve party are listed in, but you can’t actually change your party with this menu. Pressing the Triangle button toggles between screens for each character’s equipment and abilities. The System submenu has three options: Online Key Configuration Configuration The first leads to the following options regarding a battle feature that I’ll explain later. For now, feel free to ignore it and move on:
  The information below these options displays your default online information for the demo. You can ignore it. The second sub-menu, Key Configuration, leads to button changes:
 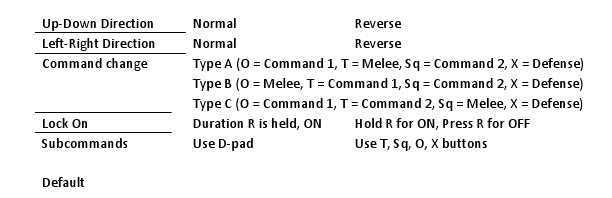 Finally, the third submenu, Configuration, leads to sound controls and other options:
  Phew. The last submenu, Control Explanations, is just that. This screen changes depending on if you’re in battle or not. This is a good time to mention summons Also, as a last-resort attack — or just when you want a big powerhouse on the field – you can summon a monster by holding Triangle and Circle simultaneously. During the practice battle, only ice-skating Shiva is available, but you can select to use Golem during the missions. The summons also have four attacks available, but they’re only present for a set period of time (I believe it’s 30 seconds) and summoning them causes your current character’s HP to fall to 0. I’m not a big fan of the summons, but I’ve also heard that they’re one of the only way (or maybe just the easiest) to take on the harder demo missions. The save point is the place to go to save and load data. There are also options to change equipment and to upgrade magic (at the Altocrystarium), but they’re not available yet. You can poke around and see what they’re about, but you can’t change anything. With the magic, you can use Phantoma to upgrade a spell’s power, range (make it more powerful for longer distances), speed, incantation time, and MP cost. Judging by how high your spell’s levels are, it’s possible that during the actual game, the spells will be weaker and slower. From top down, the save crystal menu translates as: Change Controlling Character Edit Reserve Party Equipment Character Growth Altocrystarium Save Load It’s also possible to use the AP you earned in battle to upgrade certain skills (and you can do so in the demo as well!) in the Character Growth menu. You can also change parties and characters at the save point. All in all, the practice is simple battles with only a few monsters, but I used the opportunity to break in all of the different characters. The order of the characters I use is that presented in the game, not in order of importance to the story. You can change characters simply by going to the first option in the save crystal menu and choosing the character you want. Below is a brief overview of the characters. Note that T, C, S and X stand for Triangle, Circle, Square and X, respectively. While these are the default spells assigned to each character, you can change them. One example of a spell not mentioned in the list is a defensive wall spell that both we and one of our readers noticed on Ace. Rem (Daggers):
  T: Dagger C: Fire RF (rifle) S: Thunder SHG (shotgun) X: Cure Since Rem was the default character, I used her first. One of the more magic-oriented characters, she’s a relatively fast attacker with her dagger and has the ability to cure herself, which is always handy. However, I find her magic — Missile-style Fire and Shotgun-style Thunder — to be pretty weak. At first glance, she’s probably one of those characters that level up well. I’m going to hope for her potential, but I didn’t use her at all in the demo. Nine (Spear):
 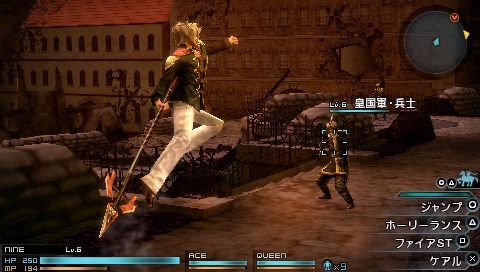 T: Spear C: Jump S: Fire RF (rifle) X: Defend Nine uses a lance and can jump into a powerful attack that is quite handy against bosses and enemies that are some distance away. He also has a fire spell that is pretty quick. I found him to be one of my favorites simply because he was more heavy-hitting, but he wasn’t too slow. He’s saved me a few times because his more powerful special attack uses AP, which can be regenerated, and because he can guard. Queen (Sword):
 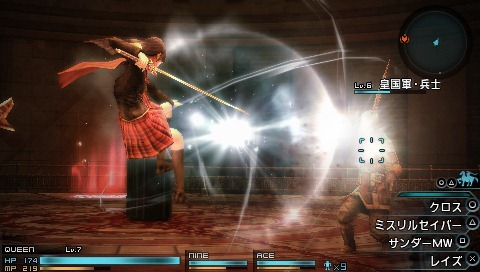 T: Long Sword C: Cross Judge S: Blizzard ROK (rocket) X: Cure Queen has a rapier and attacks in a straight line, unlike some other characters such as Rem or Ace, so actually aiming with her is trickier. However, what I really like about her are her magic spells, as she’s the only character as of yet with a Rocket-style magic. She also has an odd ability called Cross Judge, which creates a cross-shaped energy beam that revolves slowly around Queen. This beam absorbs HP from any enemy and heals any allies that step within it. In theory, it’s cool, although it moves too slowly to be useful and unfortunately Queen isn’t invulnerable while using the attack (hah, if only). Ace (Cards):
 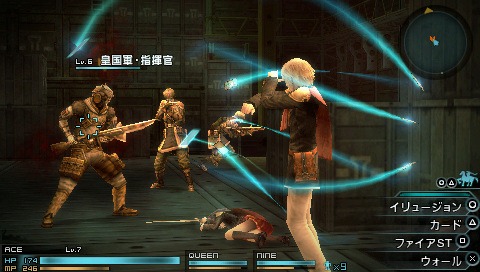 T: Card C: Deck Open S: Fire MIS2 (Missile 2) X: Cure Ace is a personal favorite, although he took some getting used to. He attacks extremely quickly with his cards and, when his weapons are out, his “dodging” becomes “teleportation,” which is just cool to see. One of his special attacks is a Missile-style fire attack, but it’s the other that is really interesting (and also hard to use). The O attack is “Deck Open,” which changes your melee attack — Triangle – so that it has another effect. For example, press it once, your Triangle button no longer activates a melee attack using cards. The effect is decided randomly, as far as I can tell. Thus far, I’ve seen a magic attack (Burst), HP Charge (which heals your HP), and MP Charge (likewise, for MP). There are also different degrees, such as MP Charge, MP Hi-Charge, and MP Mega-Charge. There are probably other options I haven’t seen yet. And then, when you choose Deck Open again, you get another randomly chosen effect. Think of “Deck Open” as a one-slot slot machine. This can be done up to four times in the demo. Sice (Scythe):
 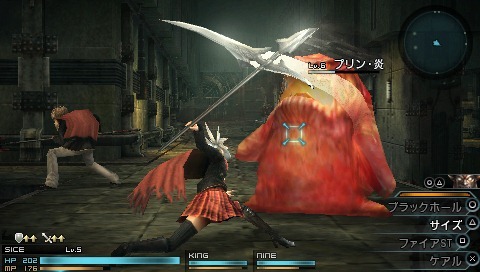 T: Scythe C: Dark Nebula S: Thunder MIS (missile) X: Cure Sice uses, appropriately, a scythe, and is another favorite. Like Ace, she’s fairly fast for a hard-hitter and she has a long range of attack. In addition, she has a long-distance ability, Dark Nebula. While she’s not particularly special (other than her weapon of choice!), she’s pretty easy to use. I used her to beat the first mission. King:
 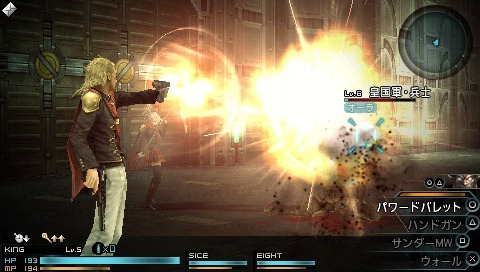 T: Handgun C: Powered Bullet S: Blizzard BOM (Bomb) X: Defend King is one of the two long-range attackers with his handguns. Unlike the others, he has to reload his guns every 12 shots. His magic and ability, though, are powerful (although they also bring their respective gauges down like nothing else) and he’s also the only current user of a Bomb-style magic. Machina:
 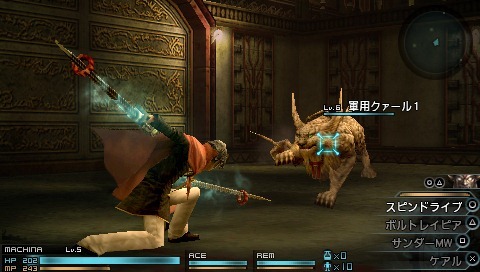 T: Bolt Rapier C: Spin Drive S: Thunder SHG (shotgun) X: Cure Machina is the last character on the roster. He wields two swords and is surprisingly slow. He hits hard, but his magic spell is fairly weak. His ability, Spin Drive, is strong, but hard to aim. I haven’t used him a lot, mostly because I tend to get shot in the face before I can finish my attack. Other than the practice battle, you can access a basic item shop and a quest from the Salon. In addition, after you finish the first (real) mission, there’s a girl with a yellow exclamation point over her head. Something will happen if you give her 5000 gil. Since I’m a broke miser and don’t have that much cash, I can’t find out what she has, unfortunately. Aside from that, it’s on to the first mission, which brings you head to head with Byakko soldiers and their wonderful monsters. Among them is a very familiar Behemoth. The missions are straightforward (defeat X enemies, run forward, defeat more), although sometimes special events happen that require you to take different actions. You can always cancel the mission midway. If you do so, you keep the EXP you’ve earned. However, if you’re completely wiped out (this includes everyone in the reserve party too; you can always switch in your party while you’re KO’d), you lose everything and start at the last save point. There are save crystals in the missions too, so you may not be starting at the very beginning, in that case. Once you’ve accepted your mission and have arrived on-site, the first thing you do is organize your party. First, you have to assign your Mission Members. These are the people that you can choose both your reserve party and your current party members from. In the demo, you can use everyone available, but in the full game, apparently there are only a limited number of slots. The game then asks whether you wish to change equipment. This is a moot point. There’s nothing to change it with. After that, the game asks whether you want a summon beast or something else. Seeing as how that “something else” isn’t available in the demo, let’s go with the summon. You then get to choose your summon beast. Every character shares the same summon, or rather, the “God of War” that will watch over you. You can choose between Golem or Shiva, although the screen implies that they have different forms or variations in the main game. Next, the first character you choose will be the one you’ll be controlling initially. After that, it’s your other two main party members. Think of your player character as A. Your two other main members are B and C. Everyone else you choose are reserve members to replace your fallen members with. Once you’re done with this, you have one more option to choose. This menu is as follows: Users (not available in demo) Backup from Magic Academy None The game asks whether you would like to play with “intrusions.” Without intrusions, the game will play as you’d expect. You’ll fight with your normal party, you can switch amongst your party, and you can swap your party with reserve members. If you choose to play with intrusions, there are two kinds. The Users option, which is basically other online people, is not available in the tutorial. The Back-up from Magic Academy option means that, during the mission, random characters (in the form of shadowy silhouettes) will will pop in during battles to aid you every now and then. There’s a couple of important points to keep in mind about these shadows: 1. These people are usually much stronger than you at this point in the game. 2. They’re controlled by an AI. When they pop into battle, they will replace either B or C (or both). They also tend to disappear at random. Once they disappear, you will have to pull B and C back out. I’ll explain how to do this in a second. 3. Turning on the Backup from Magic Academy option is effectively like adding a few super-strong, extra (albeit unreliable) members to your existing roster, which consists of A (you), B and C (two mains), and reserve members. The shadows are not reserve members. Those are only used when someone in your party dies.
 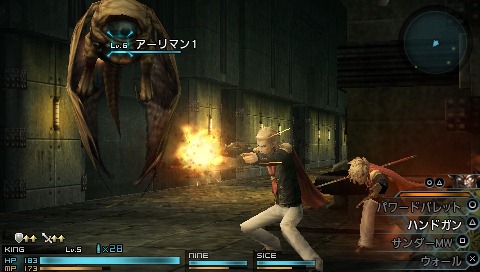 Onto the mission itself. The save crystal menu works the same as always, and you can use this opportunity to make any last-minute changes to your party using the first option. It will bring you to a familiar screen. You can switch members in the party during battle, using sub-commands. When you hold the L button, an indicator with the D-pad will appear. Pressing the left button (while holding L) will cause you to automatically shift to the next character (B and C) you chose as a party member. This change occurs instantaneously and the next character takes the place of the old one, so you don’t have to re-orient yourself to a new character’s position. The Up button brings you to the reserve party menu, where you can choose, using the D-pad, which members you want to bring into your current party. The only time you’ll be using this is if one of your party is KO’d, if you are KO’d, or if one of the backup shadow members (if you chose that option) leaves. So if shadow members replace B and C, and then disappear, hold L and press up to pull them back out from the reserve menu. The down button is marked S.O. I’m not sure what that stands for, but if you press it, you are given an option. Basically, S.O. are different “events” or “quests” that you can accept in the middle of battle. If you complete a certain task within a set time limit, you get an item. If you don’t…your current character dies. At least you have reserve members to choose from, right?! These events vary depending on where you activate them. For example, you may have to “survive with no party members for 3 minutes” or “don’t get damaged for 1 minute.” You obtain S.O. by playing through the mission. Once you’ve gotten one once, you can activate it when you replay the mission. As you already know, the demo missions get progressively harder, and the last is “impossible.” I won’t detail how to fight the missions, though I will say that the first one relies on excellent dodging technique. There’s not much to do besides watch the occasional cutscene, listen to your current party members banter in the background (yes, the dialogue will change depending on who’s in your party) as you run towards your next destination, find sparkly items on the ground, and kill, kill, kill. It’s pretty hard to sight-see while battling, but the environments are always extremely detailed. Byakko is home to soaring skyscrapers and scrap metal, while Seiryuu is covered in blue ice. I’m not sure of the context of the battles, but the animosity between the nations is clear. Nine and King go out of their way to demonstrate the difference between their and a Byakko soldier’s point of view in one of the cutscenes. After you’ve completed Mission 1, two other moogles pop up that you can talk to for missions 2 and 3. The final moogle that lets you access the “impossible” mission turns up after you’ve beaten these three missions. We hope you enjoyed reading our quick guide and found the feature useful!