

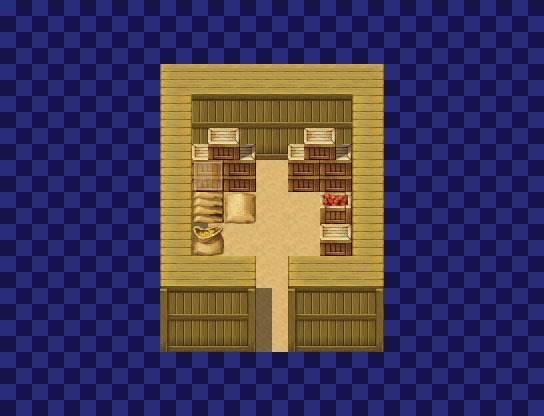
The mayor of the mountain village has recently renovated his house. After many disagreements with his lovely wife about how their house should be decorated, they are now relying on your skills to give them a house where both of them can be satisfied with the results. How to Decorate the House: 1. Download RPG Maker VX Ace. 2. The house has three floors. Select an area from any floor that you want to decorate, based on the image below. 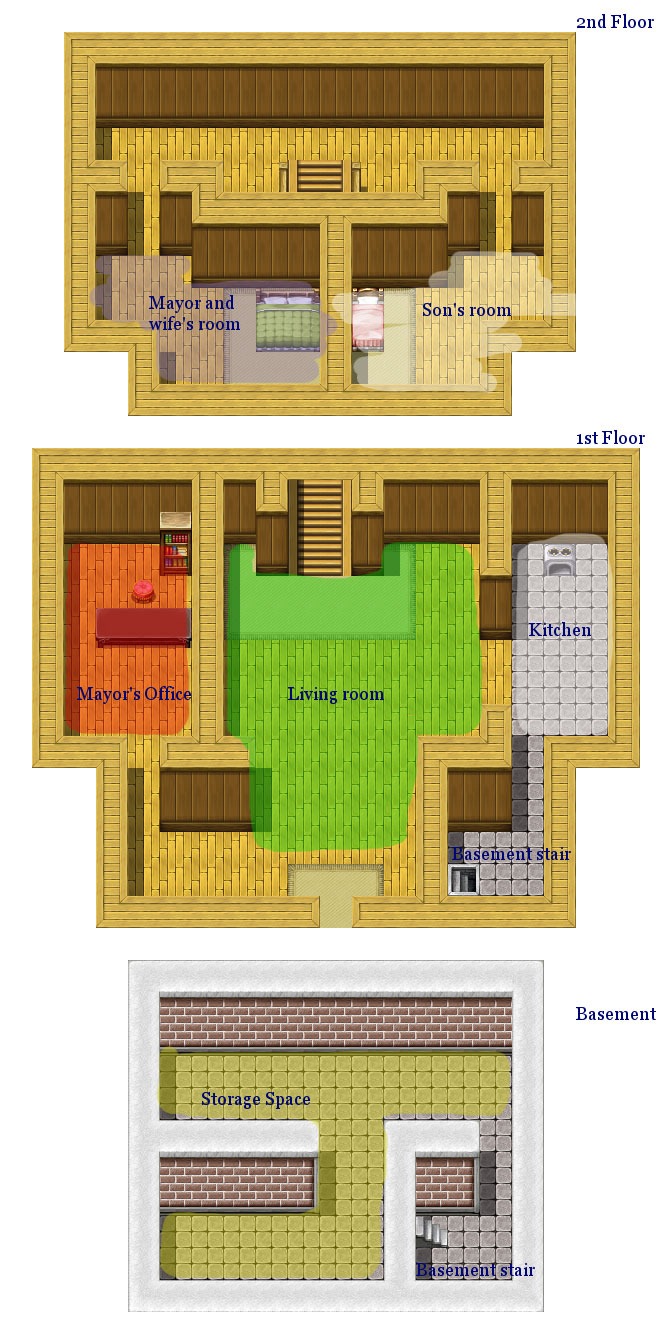 3. Download the Game Project and open it in RPG Maker VX Ace. The tutorial provided below will teach you how to design your own interiors. How to submit: Once you’re done with your submission, use a program (such as Winrar) to compile it into a .zip or a .rar file.
  Be sure to name the file as: “Username-Sectionname” for your submission. Here’s an example below.
 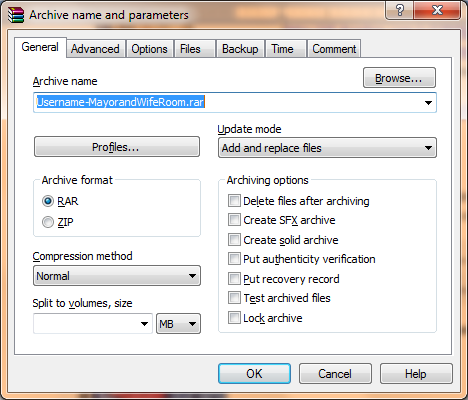 Send all your submissions to: [email protected]. We’ll pick the best interiors for inclusion in the final version of the mayor’s house in the game! Creating more kinds of maps: Interiors, Exteriors, Dungeons, World
 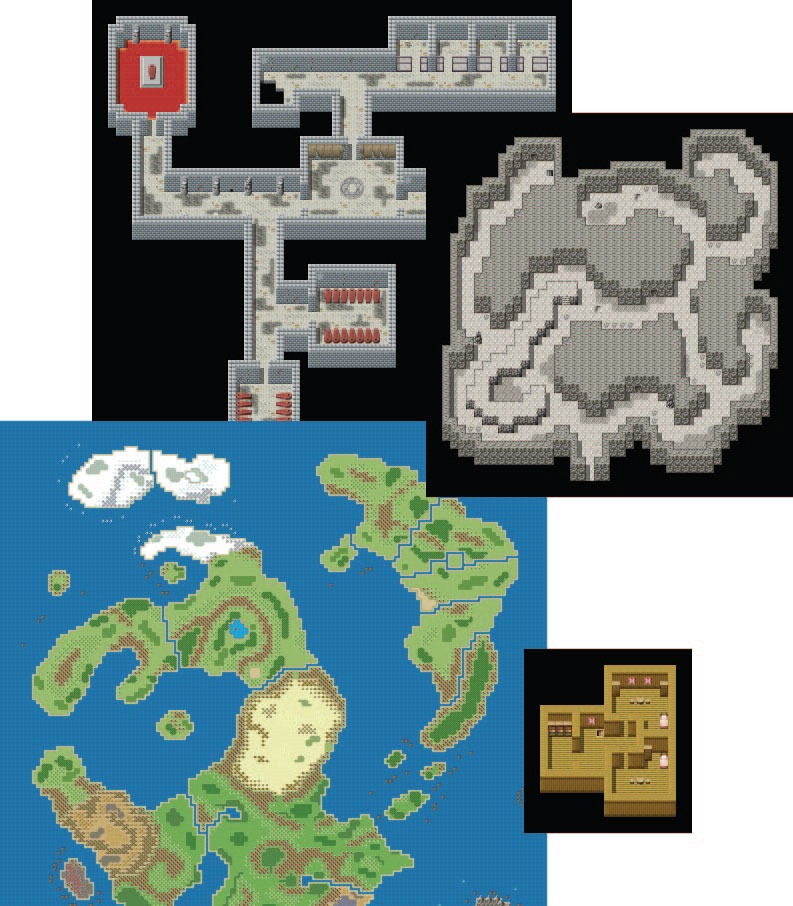 We will view maps using the following categories: Exterior Safe: This covers most town exteriors, as well as any outside area that has no encounters. Interior Safe: This covers the insides of buildings in towns primarily, but also covers friendly castles, temples and other similar places. Man-made Dungeon: This covers any area that a player will travel through which will have encounters, and is based in a building or other sentient being based structure. Natural Dungeon: This covers not only the obvious (caves), but also things like forests, or any other natural occurring environment with monsters. World Maps: While not universal in RPGs, this is a common map type, and one we will be using in our example game This is the main map that you will travel on to link together maps that are distant from one another. We will be making three interior safe maps, and one each of the dungeons and a world map in this tutorial. Things You Should Already Know Because this is continuing on our mapping knowledge that we first explored in Tutorial 2, there are a number of things you should already know before starting this Tutorial: • How to create a new map and adjust the map properties • The different layer tools in the map editor. • The different brush tools available • About the tile tabs and their relationship to layers. • How to shift copy and shift paste tile sections. • How to use cosmetic events. If any of these sound unfamiliar to you, take a moment to go back to Tutorial II and refresh yourself there. These techniques will not be explained but will be used in this tutorial and without a firm grasp of the basics you will quickly get lost. This Tutorial Reads a Little Different Unlike earlier tutorials, this tutorial will spend less time on the specifics of what is being done, and more on the structured approach and thought processes I use to get to the end goal. The reason for this is that after mastering the basic skills, mapping is mostly just an individual process and set of tastes. Every person will map differently. Because of this, the main purpose of this tutorial is to showcase different types of maps, and to walk you through a single perspective (my own) that will be used to create the maps. You will most likely find your own methods and processes the more you practice, and this is a good thing. My approach generally involves starting with a base and building on top of it, but you might work better working on smaller areas at a time. Both are valid approaches, and there are a million other approaches as well. Find the approach that works for you and practice practice practice. Time is the best teacher of good mapping.

Elder’s House Floor 1 Elder’s House Floor 2 Storage Shack
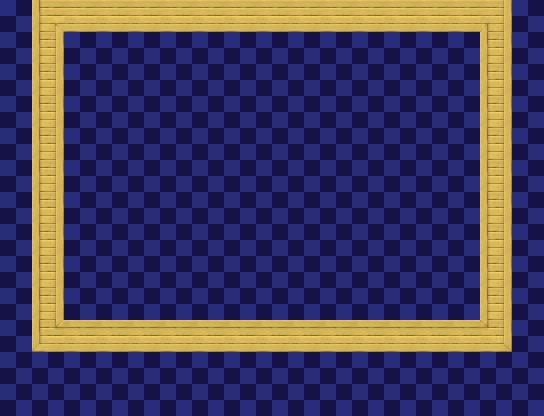
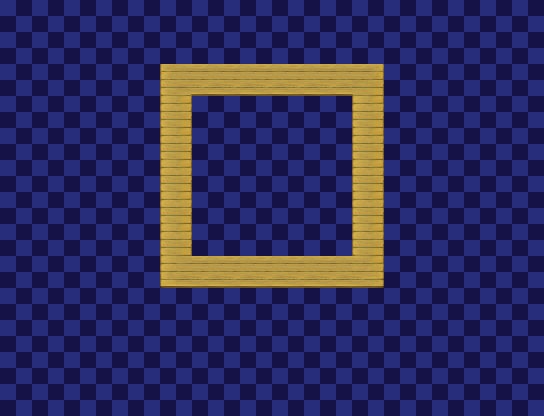
First, I’m going to fill in the interiors of the two buildings I created in Tutorial II when making the outside area around the Village Elder’s house. I will be making three maps at the same time here, as the methods used are the same. To start the map, I will create a map using the Interior tileset in the Map Properties. 17 x 13 tiles is the minimum size of a VX Ace map, and in this case, I believe all three can be made in that size or less. Now I select an appropriate wall top tile (in the A Tab of the tileset). Since all three of these buildings are wood, I select the older looking wood autotile for the Storage Shack, and the newer wood autotile for both floors of the Village Elder’s House. From this point, I draw the basic shape of the building. Don’t try and keep the insides the same size as the outside, just keep the same general shape, and keep the scale between buildings similar. I settle on a scale of ~2:1 between inside:outside dimensions.
Elder’s House Floor 1 Elder’s House Floor 2 Storage Shack
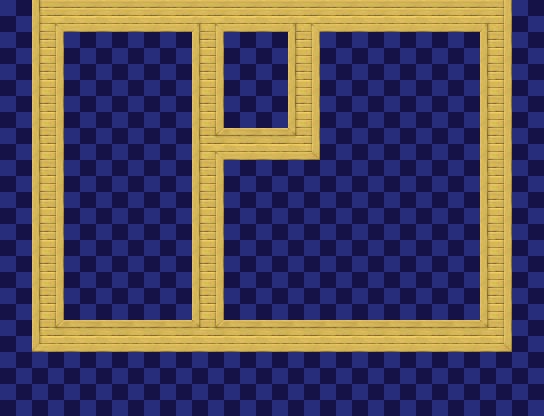
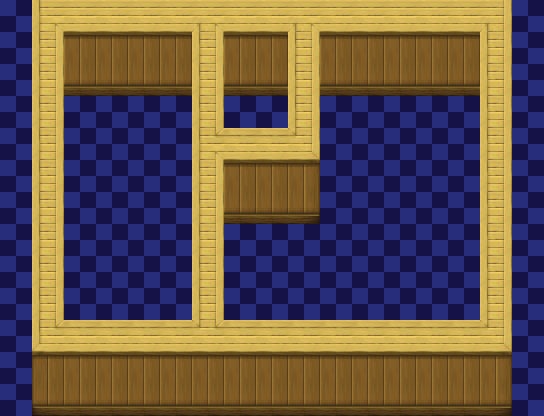
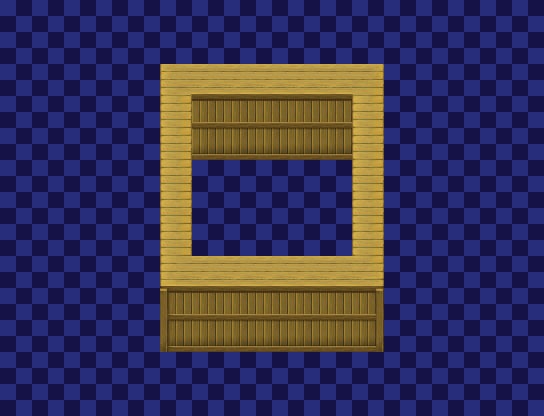
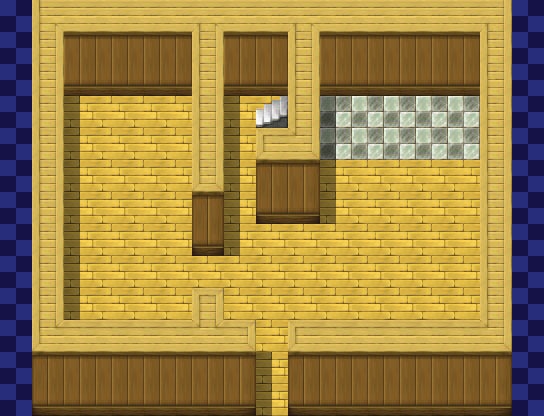
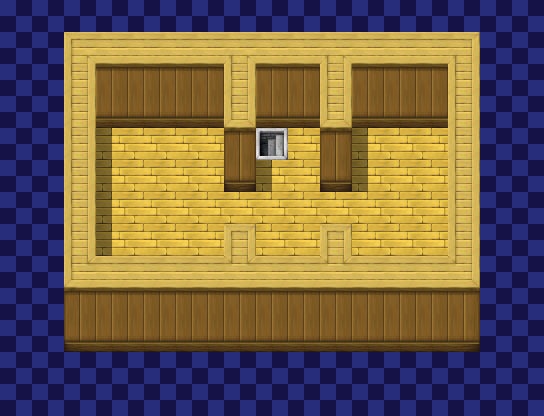
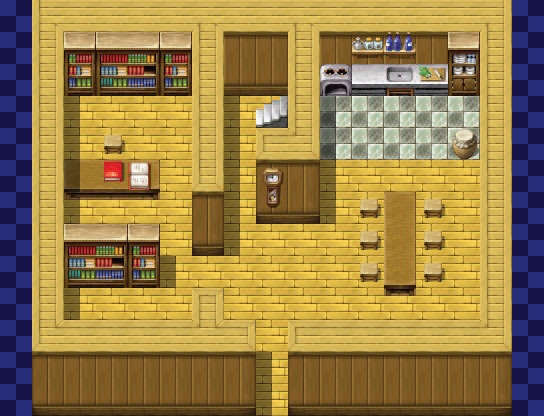
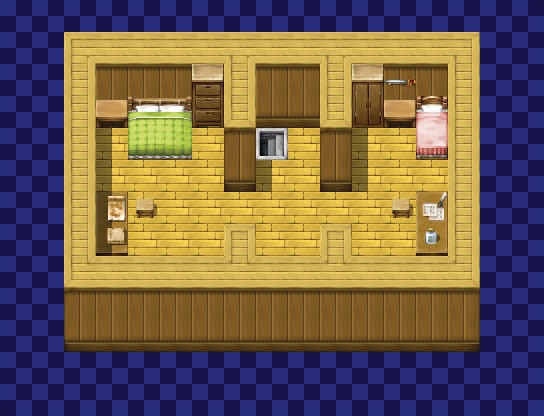
Next, using the same wall top tile, divide each map into the rooms that will be in the building. Always keep in mind what you are going to put in each area. Don’t divide up the buildings without a plan, otherwise you will probably spend most of your time mapping moving walls around to adjust to what you are putting in. In the first floor of the Village Elder’s house I divide the map into three “rooms”. On the left, I am creating a single long room for a library. This will be used to put a few books for the player to read to fill him in on the myth and lore of the world. On the right is a meeting area and kitchen. The small middle room is a place to put stairs. The upper floor is divided from left to right into the Village Elder’s bedroom, hallway, and Ryan’s bedroom. Ryan’s bedroom will be used to heal up the party. The storage shack remains the same at this point, as it doesn’t need rooms.
Elder’s House Floor 1 Elder’s House Floor 2 Storage Shack
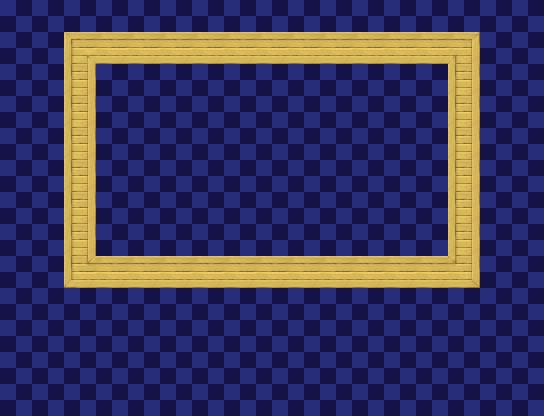
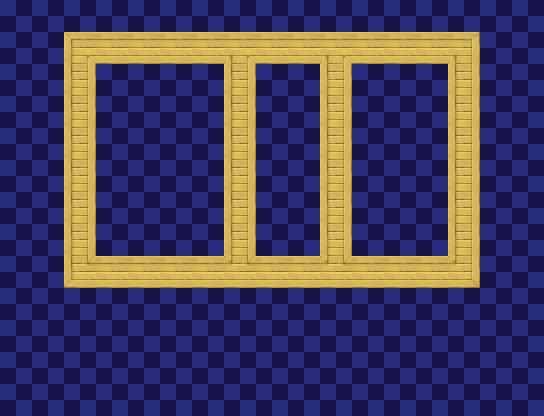
Switch your tile to a wall tile. Generally you can use the wall tile that matches up with the wall top you used, but you can switch it up if you feel you need to. In this case, I feel the matched tiles look best. Place two tiles below each horizontal wall top tile section. You can go with one tile high walls if you desire, but the RTP is designed around two tile high by default. Because of this, there are some things to keep in mind when mapping out a room. First of all, notice that while a vertical wall section is only one tile wide, a horizontal wall section is three tiles wide. Because of this, you have to sometimes stretch things from top to bottom to fit in things you need. As an example, in the last step, it looked like I was leaving a lot of room for the stairs in that small middle room on the lower floor. In reality, I was leaving only a single floor tile area to place it on.

Elder’s House Floor 1 Elder’s House Floor 2 Storage Shack
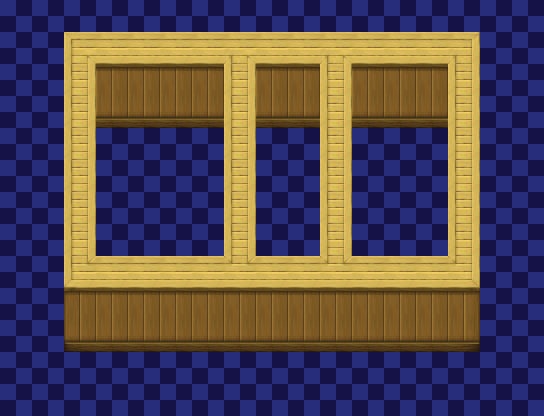
Now that we have walls, the next thing we need are floors. Look at the floor tiles available to you, and identify ones that will be useful for you. For the Village Elder’s House, I select the horizontal running hardwood floors for the majority of the house, and a simple checkered tile floor for the kitchen area. Try and make sure the tile matches the area not just visibly but logically. A village elder in a small mountain town isn’t going to have expensive looking carpet. For the storage shack, I just select some dirt floor. No reason for them to have put in flooring material. I also take the time here to cut out doors. Remember that if you have a passageway going from left to right, rather than top to bottom, you will need to cut away on tile of the ceiling for floor and replace two with wall tiles. Right click copying makes this much faster. I went ahead and put the stairs in place as well. Make sure their locations match up from the top to bottom floor.
Elder’s House Floor 1 Elder’s House Floor 2 Storage Shack
Now its time to fill the rooms. You might think this step should be much longer, but in reality almost all the things in this step are very similar. Aside from the counter autotile used for the table and desks which are on Tab A, the rest of the tiles are all on Tile B and C. Select tiles that match the area you are putting them in, try and fill up the large areas of blank space. Try not to just put tiles down to create clutter though. Look around your own living room. Do you have papers and books all over the floor, along with barrels, bags of grain, etc? No, probably not. People tend to keep things relatively clean, so don’t try to clutter up living spaces unless a character is specifically rather messy. Another thing to keep in mind is placing items against walls. Because of the way the RTP is designed, if you place a single item like a stove or bookshelf against a wall, it is best to cover the entire wall to avoid the bottom of the wall being visible. This keeps players from noticing that the bottom of the shelf is in the same place as the wall bottom. 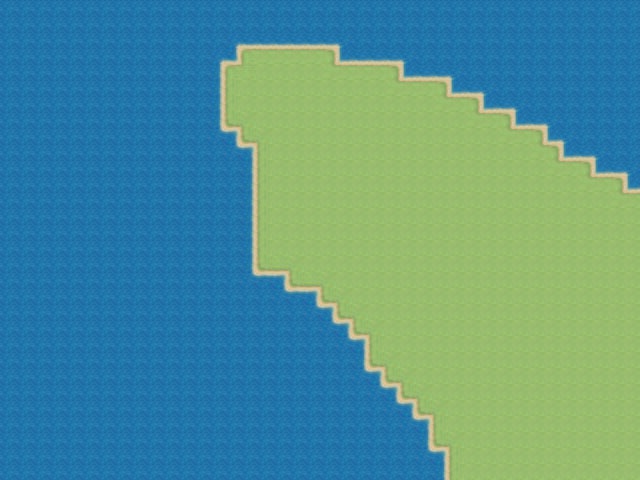 Next, let’s turn our attention to creating a World Map. First, I create a map using the Field tileset with a size of 40 x 30 tiles. When creating a World Map, don’t make it larger than you really need. Its hard to fill in too much space. The first thing to do is just draw a vague shape for what you are working with the primary tile you will be using for that landmass (in this case, grass).
  Next I turn my attention to something I mentioned in Tutorial IV. The Merchant was trapped in the village because of a landslide. Of course, I would need mountains anyway for the village, but this gives me a clue to the location we will need to place them. I create a ridge of mountains blocking travelling outside of the area I’m working with to the southeast. I create a single pass that I will have blocked by a worker later.
 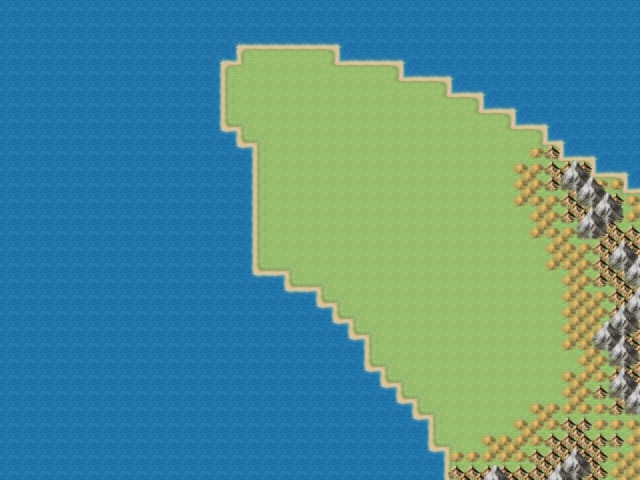 Let’s dress up our mountain range. First, grab the hill tile. Generally you don’t have mountains turning directly into plains. So why don’t we put hills all around the mountains. Along with hills, since this was an area that was preventing travel, why don’t we put some really high peaks in there as well. These are found in Tile B. You use these just like we did large tree tiles in the village map.
 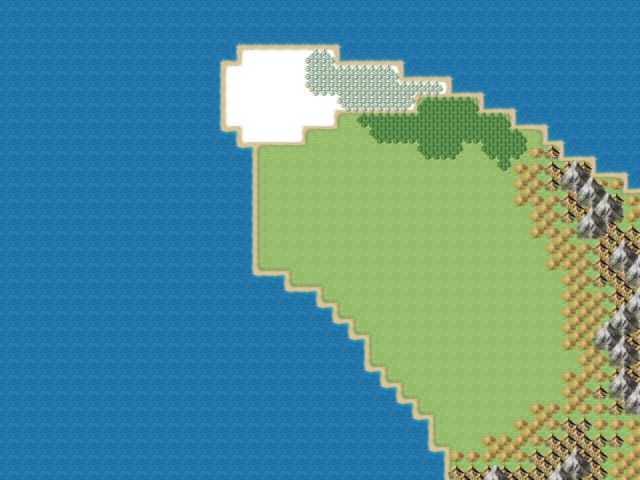 Thinking back to my items, I remember that I have ice crystals as a drop item. Well it makes sense to have these drop from monsters in snowy areas. I switch to the snow autotile and paint the northern tip of the peninsula I had created. It still looks a little bland, so I draw a pine forest in the snowy area. To lap some of flora, I extend the pine forest into the grasslands to the south of it.
 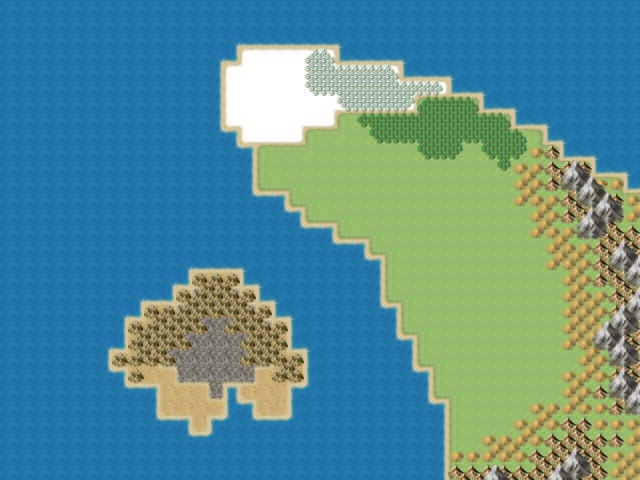 But where will we put our dungeon? I like the idea of a fiery volcano dungeon, so why don’t we build it on a separate island. I build it originally with rock ground autotile, then lap a bit of volcanic ground autotile near the center. I use a different type of mountains in to have a place to put my volcano. As a side note this also gives me a good place for monsters to drop fire crystals.
 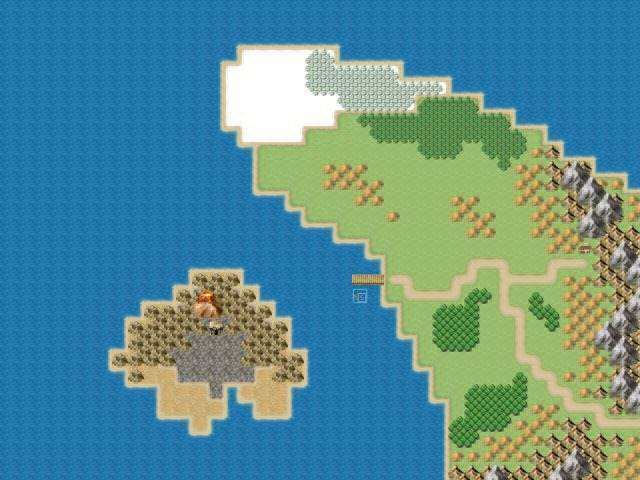 Now for the finishing touches. I start by placing my locations. I place the village elder’s house over near the mountains in the hilly areas, then place a volcano with a small ruins in front of it on the island. Next, I put a dock for a small boat, and connect the pass, dock, and town with paths. Finally, I drop a few extra tiles in to break up the grassland.
 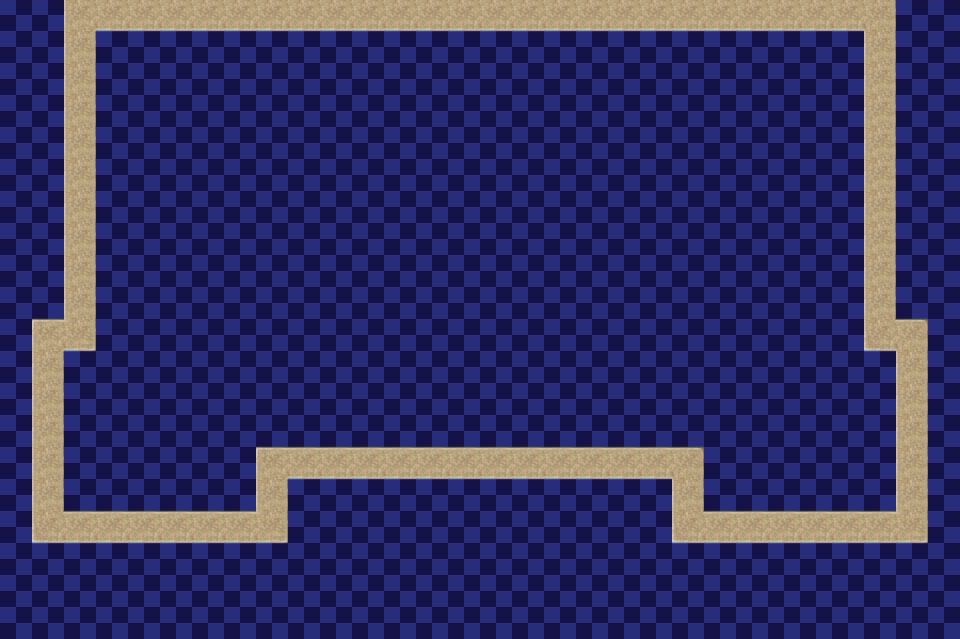 For my dungeon, I want to have a temple ruin that opens up in the back into a lava cave. The temple ruin will obviously fit in the man-made dungeon category. I start this similar to how I would an interior safe map. First start a new map with the Dungeon tileset. You will want this to be bigger so to provide more area for your player to travel. This map is 30 x 20 tiles. I pick a wall top tile and draw out the building outline.
 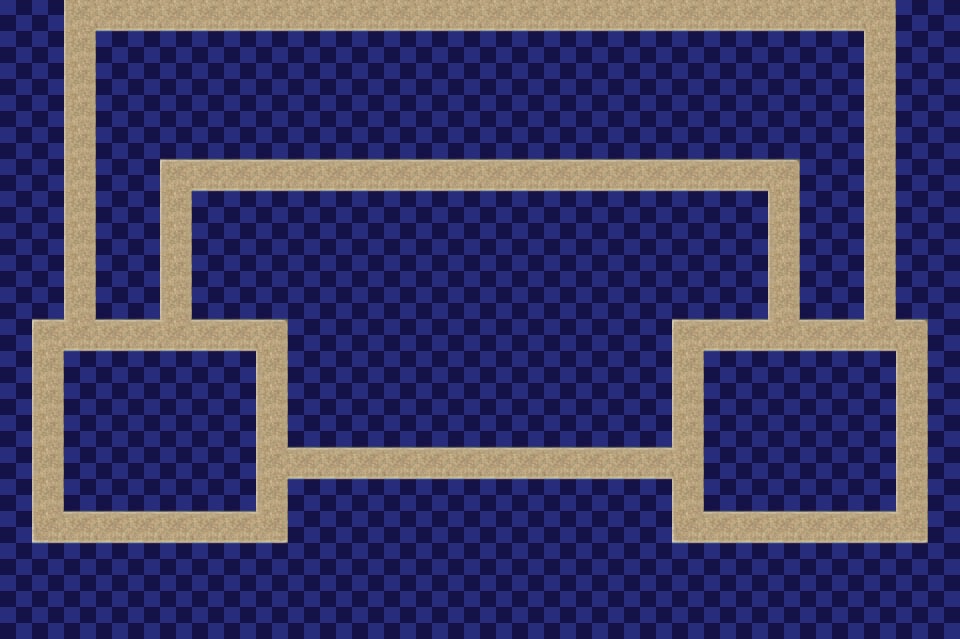 Now I proceed to make interior rooms. Don’t over think it when you are creating man-made structures and put in mazes and such (unless it was specifically made as a maze). In general humans create symmetrical designs, or close enough to symmetrical. We also favor straight walls and precise angles in our designs. With that in mind I create a main room, a hallway, and two side rooms.
 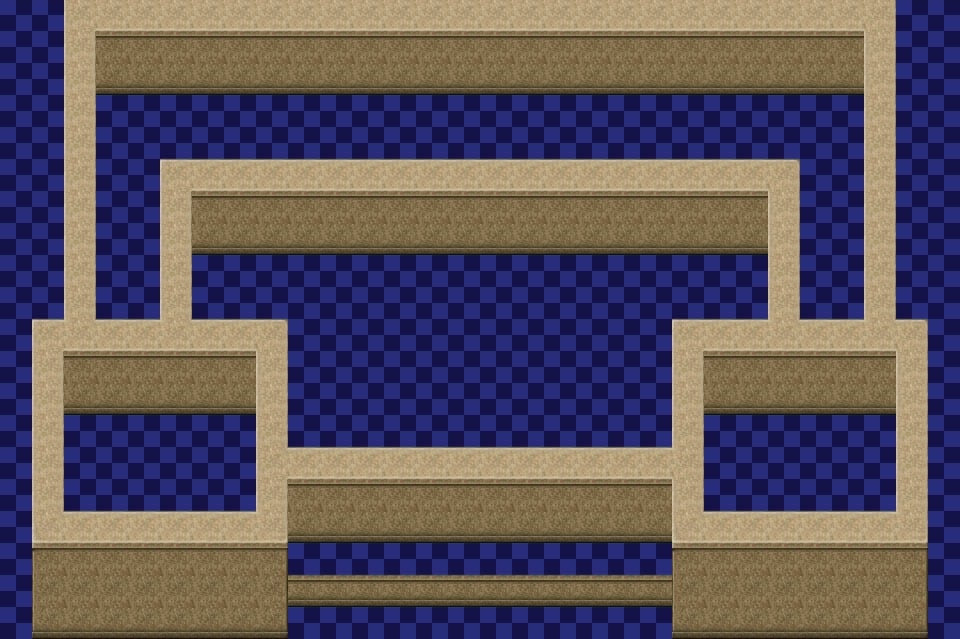 Now its time to put in the walls. I create the interior walls two high, while the outside walls are three high. This is so I can throw in a height change to create an outside stoop. Remember to always keep overall height differences from the “ground” level in mind when creating the walls. If you don’t always go the same number of tiles from two areas of the same height, you create an incorrect perspective.
 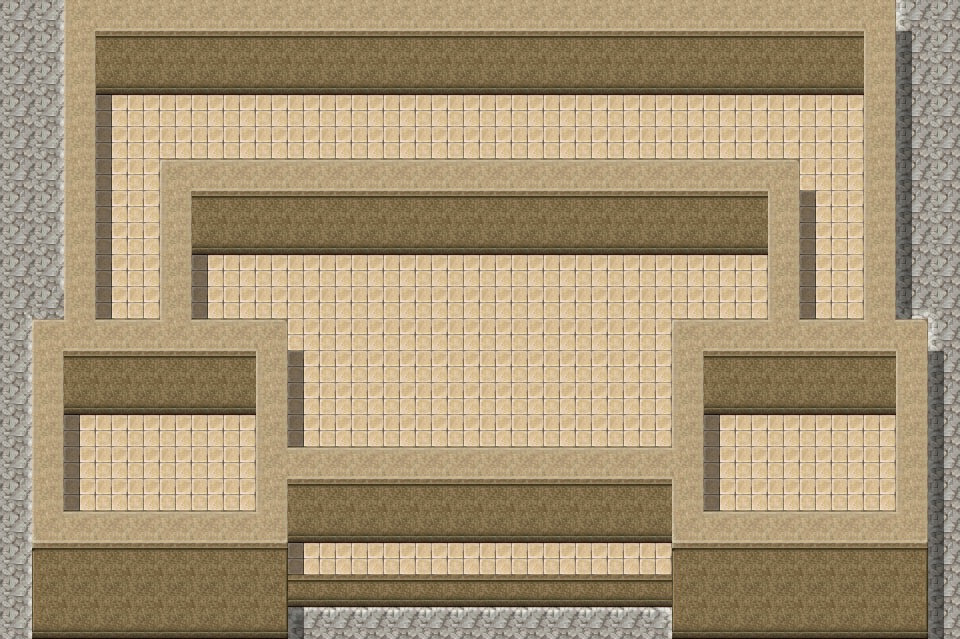 Now I fill in the floors. Being a temple, I decided to go with a slate tile floor tile for both the interior, as well as for the outside stoop section. I thought about using two types of tiles inside, but felt it was unnecessary. Remember the fill tool, no reason to put these in a single tile at a time. For outside the building I pick a grey rocky terrain, as we are sitting right outside of a volcano.
 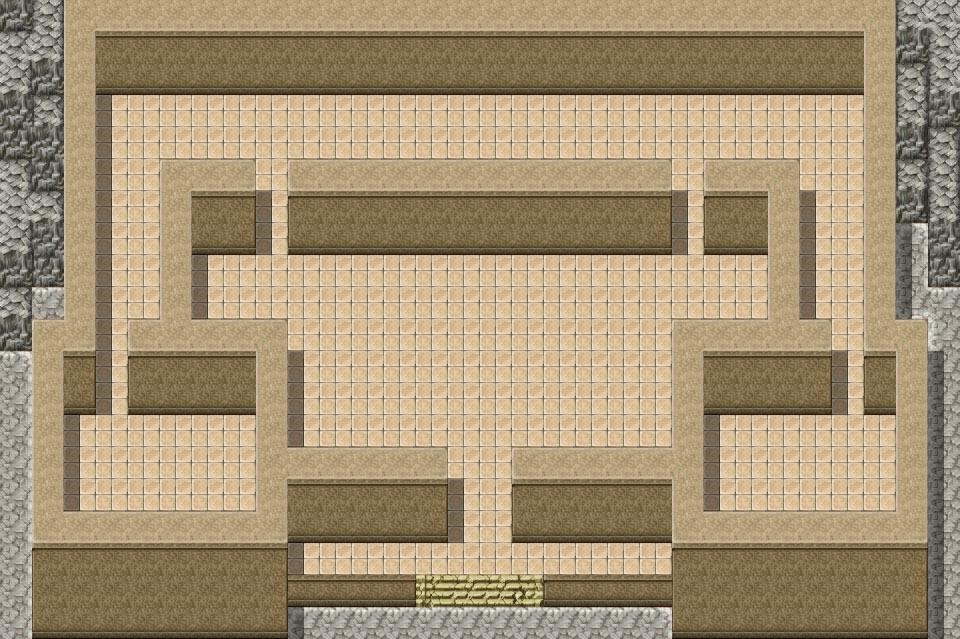 In this step, I’ve done several things. First, I’ve cut out for the doors. In this one I did all vertical passageways. I set them symmetrical for balance, this was a temple after all. The second thing I did was put in stairs. Since its old and abandoned, I pick the crumbling stairs. The last thing I did was make the building look like it was built into the rock face by building cliffs on either side. Remember, varying height is interesting to the eye.
 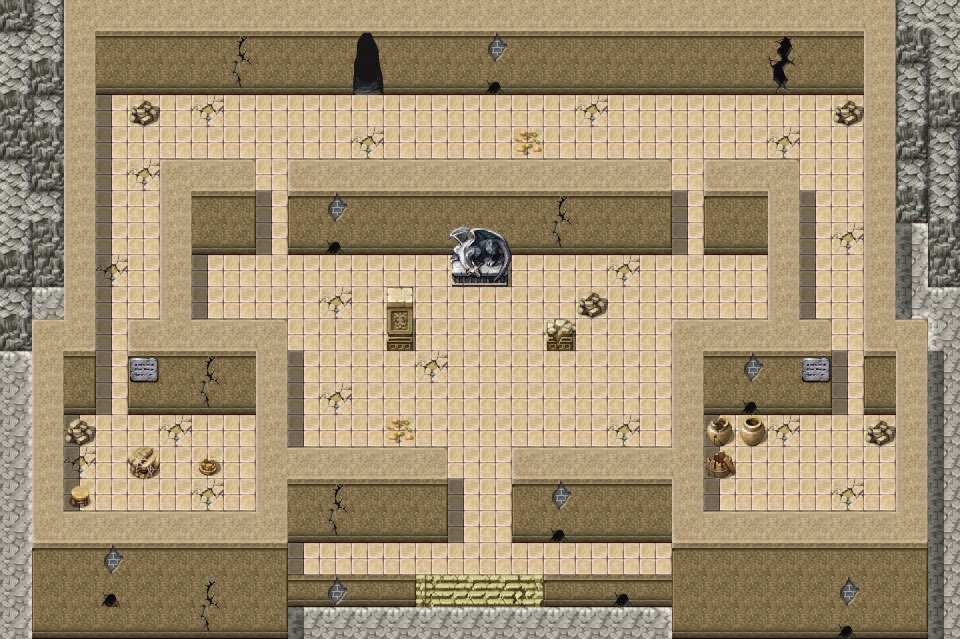 In this last step, I put in decorations. Most of these are crumbling cracks in the walls and floor and rubble. I place a cave-like doorway in the back which will head into the fire cave. It will remain hidden until the player finishes a small riddle puzzle that is based on the dragon statue and the two tablets on the walls. Try not to overdo the cracks and destruction though, too much and it looks repetitive.
 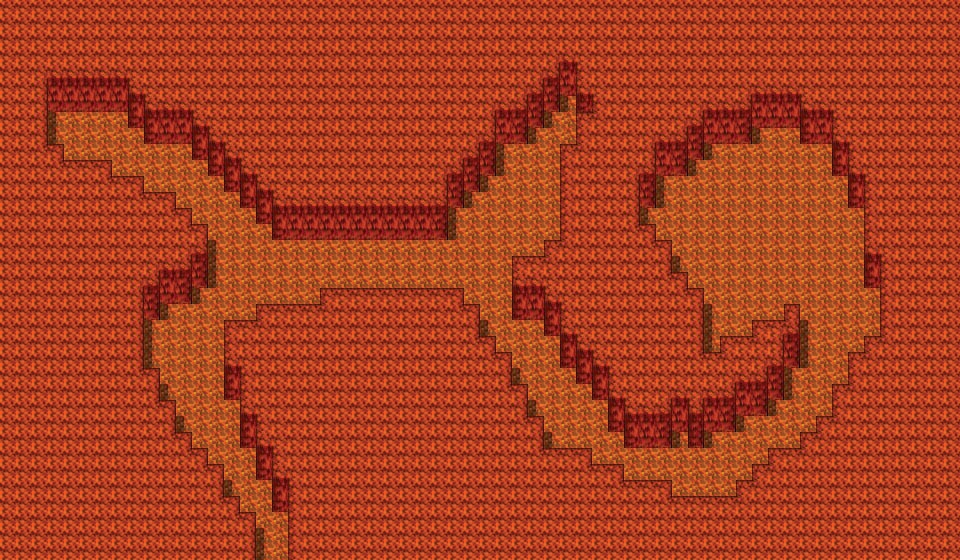 Now I can move on to the last map we will be making in this tutorial: The Fire Cave. With caves, I tend to start with the “wall top” tile and fill the entire map (this one is 40 x 30). Then I carve out using the floor tile and fill in what I carve out. I skipped the individual steps as putting in walls should be familiar to you at this point. Try not to draw too the walls too straight. Caves are more chaotic, being made by nature, rather than human hands. Varying Barriers This is a good time to stop and talk about a bit of map building theory that I’ve discovered while working on my own maps. A lot of people when they create caves, rely solely on cave walls to keep players in. This is functional, but not incredibly pretty. Instead, try to vary what blocks the players path. In a cave you can have all kinds of barriers: • Cave Walls • Water • Lava • Height changes • Rubble • Man-Made barriers like jail bars By varying the kinds of barriers you use you can create a much more visually appealing map.
  This map overall grew much more organically, and much less structured. In an odd way, this mirrors its natural origin. The first thing I did is bring in some lava to vary the barriers imposed in my map. Being inside a volcano, I felt this was a natural choice. Also, don’t be afraid to alter the shape of what you originally had if it looks better. Map making is all about constant adjustments, nothing is written in stone.
 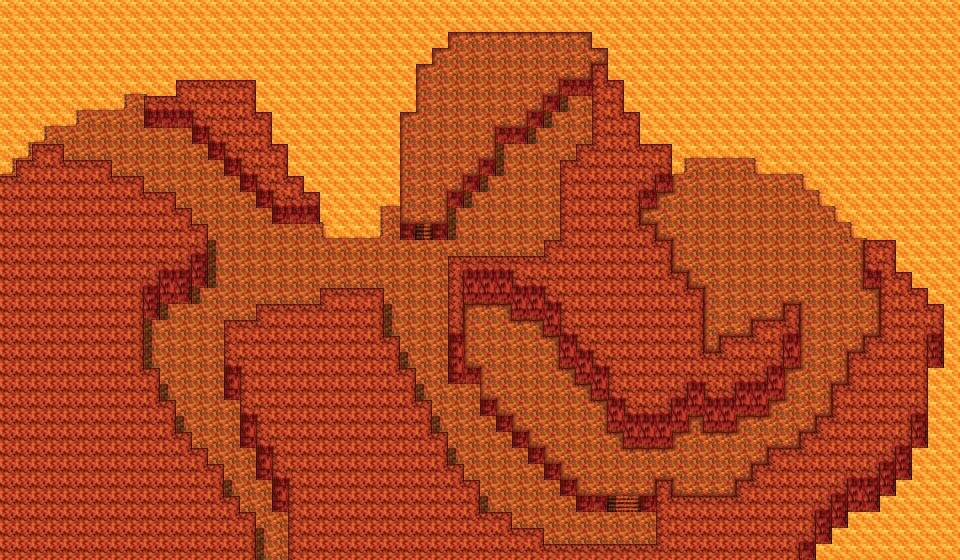 At this point, I continue to add varying barriers. I add in some height changes, and actually convert some areas that were originally walls into walkable areas. At this point we learn another cool feature of autotiles: You can walk on top of autotile walls as long as you have a way to get up there. The raised walkable sections look like the same tile as the lower walkable sections, but actually aren’t, its a wall top tile with the same design.
 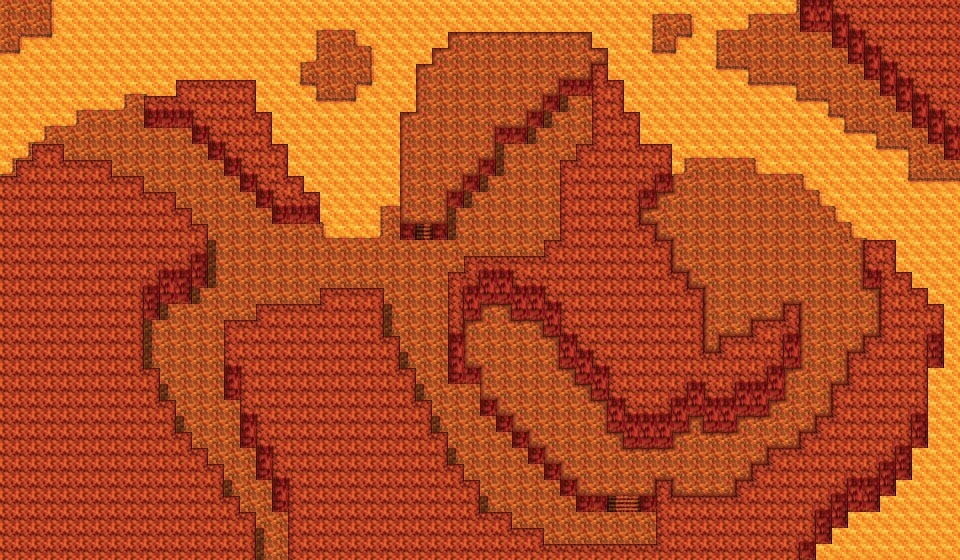 Now I add in some spots in the lava that you can’t actually reach. Why put things down you can’t reach? Because it breaks up the lava visually. You will also notice the large amount of shift copy-pasting I’ve used on the lava. Since the lava isn’t ending right where the wall tops are, we need to get rid of the “shore” it builds in the autotile. Shift right click appropriate lava tiles and shift left click to put them in place to get rid of these shores.
 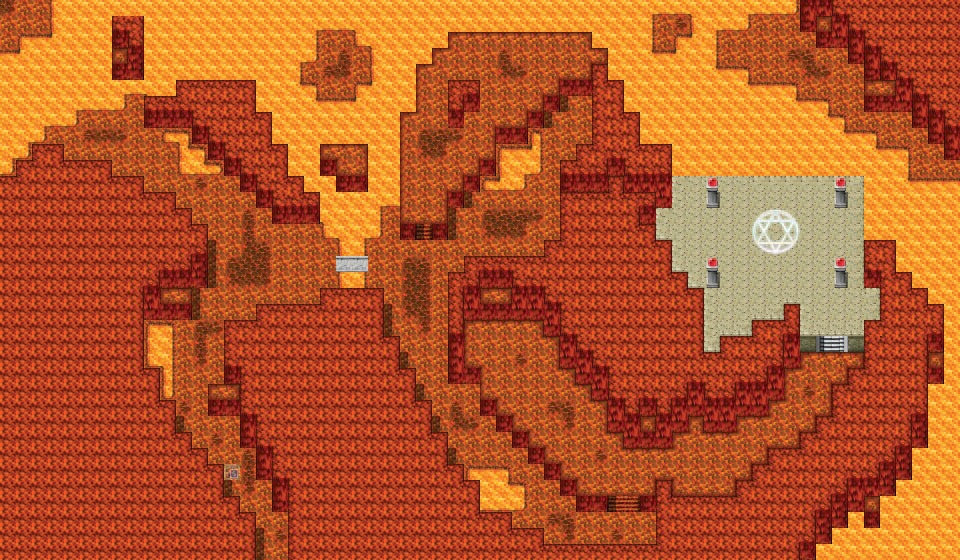 In this stage I add a lot of detail, as well as a raise man-made temple style area for the boss fight. I used a darker lava stone tile to break up the walkable area a bit visually, and used smaller pools of lava regularly so it is almost always visible. I also decided to cut all the way into one walkable area and place a bridge down. One thing to keep in mind is you have to shift click the area right to the south of the stone steps so that it doesn’t have the edge of the auto tile, otherwise it won’t be passable. In my last step, I just polish up what I already have. I decided that the area for the boss fight didn’t look man-made enough, it was too irregular in shape. I changed it to be more symmetrical. I also cut a lava river all the way down the middle, and cut away more of the outside with lava. Finally, I added a ton of height differences into the walls. These serve no functional purpose, but breaks up repetitive parts of the map. Tutorial Wrap-up We’ve covered a lot in this tutorial and have made a lot of visual progress on our game. We have gone over creating several map types and how they are different and how they are similar. We created three interior maps for buildings in the mountain village map we made in Tutorial II, two floors for the village elder’s house, and a small shack. We built a world map with varying geography to connect together our locations, and two connecting dungeon maps, one a man made ruined temple, the other a natural cave in a volcano. Next Tutorial Preview In the next tutorial we will be creating the random encounters that our heroes will come across. We will go over two important encounter components, balancing encounters and encounter variety. We will also discuss experience and character growth.