
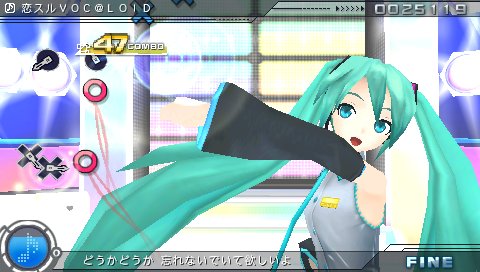
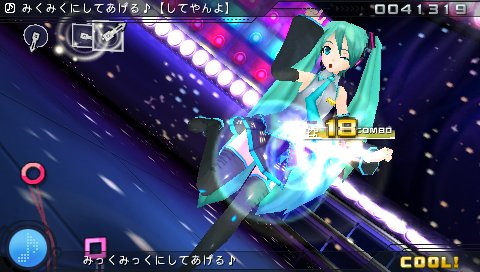
We’ve been taking a pretty extensive look at Sega’s Hatsune Miku: Project Diva, a PSP game starring the popular Vocaloid character that’s easily one of the best games to come out of Japan this year. Today, we’re taking a closer look at one of the most unique aspects of the game, an edit mode which allows players to import their own .mp3 files into the game to create up to 90 custom songs and music videos.
Before we get started, there’s some restrictions when it comes to what kind of .mp3s it will accept. It must be an MPEG audio file recorded at an adequate bit rate. For example, I record mp3s into my computer at a 64 kbps bit rate to allow for smaller files and more room on my iPod. These can’t be used. I’ve found they need to be recorded at a bit rate of at least 128 kbps to be useable.
First, you want to get to the Edit Mode. It’s the fourth option in the main menu. This takes you to another menu with five options. The first one lets you start creating a whole new custom song, and the second one lets you load and continue working on a previously existing one. The third one lets you load and play a song you, or someone else, has created. The fourth lets you watch a music video for one of the created tracks. The last option lets you just make a music video, and not bother with making an actual custom song you can play.
I’m going to go with the rudimentary basics. Just enough to get you started to make a pretty cool looking song you can play without too much difficulty. Let’s say we’re starting a new song. First choose the first option. You’ll be taken to the screens that allow you to choose the song for your project. You can choose from one of the songs included on the UMD or use one of your own. Tap the R button to sort through your own tracks. At this point you’re also able to test and see if your songs can be imported and used. Pressing the square button tells you if you can use a song, and also lets you hear it (in case you forgot what it sounded like, I guess).
Next, you figure out the BPM for the song. If you know it going in, that’s great. If not, Hatsune Miku: Project Diva makes it easy for you. Start the song running in the background by pressing the square button. Then, press the triangle button. It starts at 120 BPM, but by listening and adjusting that number, you can determine the BPM for a song. Remember to turn the metronome off, then on again once you change the BPM to determine if you’ve got it right. Then, you go to a new screen where you get to set the beat. You have three options, 2/4, 3/4 and 4/4.
After that, you start to make selections to determine what you’re going to see, or hear, in your music video. First, you decide on Miku’s costume. Pressing the square button here lets you see a picture of Miku in the costume on the right, to help you determine if you’re making the right decision. You only have access to costumes and Vocaloids you’ve already unlocked in the main mode.
The next major decision is what noise the game will make when you press one of the action buttons to hit a note. There’s a wide selection, including Miku, Len or Rin saying things like “Aha!” or “Yo!”
After that, you can set up a standard appearance for note indicators on the screen. This is optional – the first option lets you skip this for now and handle it later on when you’re making all of your selections. The second lets you set it up now. Personally, I prefer to do it later, so we’ll skip to the next step, location settings. You can pick 20 spots for your video to showcase. Press the circle button on one of the menu slots to go to the locations menu. When you press the square button, you can see the image of the place on the right. For your first original song and video, I’d go simple. Perhaps choose just one location and focus on dancing and camera angles highlighting different locations there.
The next screen allows you to choose 30 dance moves or actions to include in the video. The first one, which has to be included, is Miku (or one of the other vocaloids) standing still. When you move down and press circle on one of the empty slots, you are taken to an action menu. Here, you can press the square button to check out the move and determine if you want to use it. I’d recommend selecting more than you’d think you’d need, just so you have a wide variety to choose from.
Once that’s all done, you briefly watch a loading screen. Then, you’re introduced to a series of grids. The first screen shows three different categories, and goes through all beats in the song. The first option lets you manually edit and tweak the BPM, beats and also set the indicators for that first set. Since you can change the BPM mid-song, more advanced song editors can choose songs with varying rates and manipulate the speed mid-song. The second option allows you to organize beats you’ve indicated in the first part. You’re shown a grid, and you can place the indicators, in order, any place you want. You can even change the direction the icons will glide in from across the screen using the directional nob. There are also presets, in case you don’t want to edit every time. The last option changes the visuals you’ll see and takes you to a whole new grid to look at.
The visual grid has five categories to it. The first one lets you add or remove Miku to the scene. The next focuses on Miku’s face, allowing you to change her expression and the shape of her mouth. If you do it properly, you can almost make it look like she’s lip-syncing along. The next option shows all of the movement and actions options you selected earlier, choosing the one you want to appear that moment in the song. After that is an option to choose a location. (If you only chose one, you can ignore this. Your first location will automatically be the one that appears.) The final option is the most extensive – it manages the camera. You can determine every aspect of it, angle, view, if it’s moving, etc. If you aren’t satisfied with the preset angles, you can create your own.
In case you’re tired of deciding every single option, there’s a copy and paste function. Press the square button on the column you wish to duplicate. Then move to the column you want it to reappear in and press the triangle button.
If you want to check out how the song looks so far, press the select button and it’ll go to a preview mode. While that’s running, press select again to keep track of what beat you’re on. Pressing start here brings up a menu that lets you resume, restart or return to the editing screen. You can also test out your indicator arrangement here, determining if the song is too easy/difficult/etc.
When you’re in the main creation menu, you can press the start button to bring up a whole new menu. Here you can save your progress, edit options you arranged earlier, put in button presses while the song is actually playing, change the way notes appear on the screen, set where the song will start in case you want to remove an intro or something like that or return to the previous screen or main menu.
In order, it goes like this:
- Save
- Choose a Song
- Change Miku’s appearance
- Choose backgrounds
- Edit choreography
- Change your beat indicator noise
- Input notes while playing
- Note indicator arrangement
- Song start
- Edit Mode Menu
- Main Menu
If you want to return to the creation grids, just press the X button to go back. Don’t choose either of the last two options, or you’ll lose any of the progress you made in this section.
The seventh option is quite possibly the most useful feature. Instead of trying to figure out what buttons to push when, you can do it while the song is actually playing. It isn’t perfect – sometimes there’s a bit of a lag or it won’t register the button at the exact time you pressed it, instead putting it onto a later beat, but it’s a great resource and I highly recommend using it to create your song. A good idea is to use this to get a basic layout, go back and preview play the song and then go to the standard grid to fine tune your creation.
Something to keep in mind – whenever you lead a custom song from the Edit Mode menu from a saved file, you’ll have to reload the mp3 as well. So make sure you keep the tracks you’ve used on your PSP.
And now, I make my Hatsune Miku: Project Diva Edit Mode debut with two custom song files, which are saved in slots 04 and 05. I’ve learned a lot while actually persevering to complete a song, mainly that I was probably never destined for a career as a choreographer or director. To install these, just drag and drop the folder into your PSP save file folder, and drag and drop the songs into your MUSIC folder.
Regardless, The first custom song of “Ladies Night ~another night~” by Ayumi Hamasaki. It can be found on her Blue Bird EP, and is available to download from the US and Japanese iTunes store. (On the US store it costs 99 cents.) It’s the first song I’ve actually created and completed, so please excuse the poor quality, especially with the indicator arrangement. It takes place in one location, one of the arenas, and stars Miku. I’d rank it as a hard difficulty, because it uses all four buttons and the indicator arrangement didn’t come out too well.
The second song will be a bit tougher for people to find, unfortunately. It’s “Dragon” by Zwei, and appears on the album Z or the Dragon single. This was the second song I created, and I think it came out pretty well. (At the very least, the PV is pretty good.) Both Play-Asia and Yes Asia have the CDs and singles, as does the Japanese iTunes store. It takes place in four locations and came out pretty good, I think. The note arrangement and choices are a bit suspect, but work for the most part. I’d say it falls somewhere between normal and hard difficulty levels, and it only uses the X and O buttons.